Creating centerpieces for your wedding is an undertaking. Don’t get me wrong. It’s a manageable undertaking, but it’s a project you should be going into with as much information at your disposal as possible. The problem is, there are tons and tons of centerpieces that are lush and big that you see on Pinterest, but then once you decide to tackle it yourself, you realize on shopping day the flowers are so expensive you can buy like two stems instead of twenty. Or you show up at the venue and realize you have half the amount of flowers you need to create the same look.
However, just because you don’t have a swimming pool full of money doesn’t mean you shouldn’t be able to have a wedding that’s formal in style. And just because you’re stuck with a ballroom where you have to go a little more formal, doesn’t mean your wedding can’t be hip, right? Well, those formal-but-also-kinda-hip centerpieces on Pinterest are a bit like unicorns—they’re all very pretty, but no one’s telling you how to get your own.
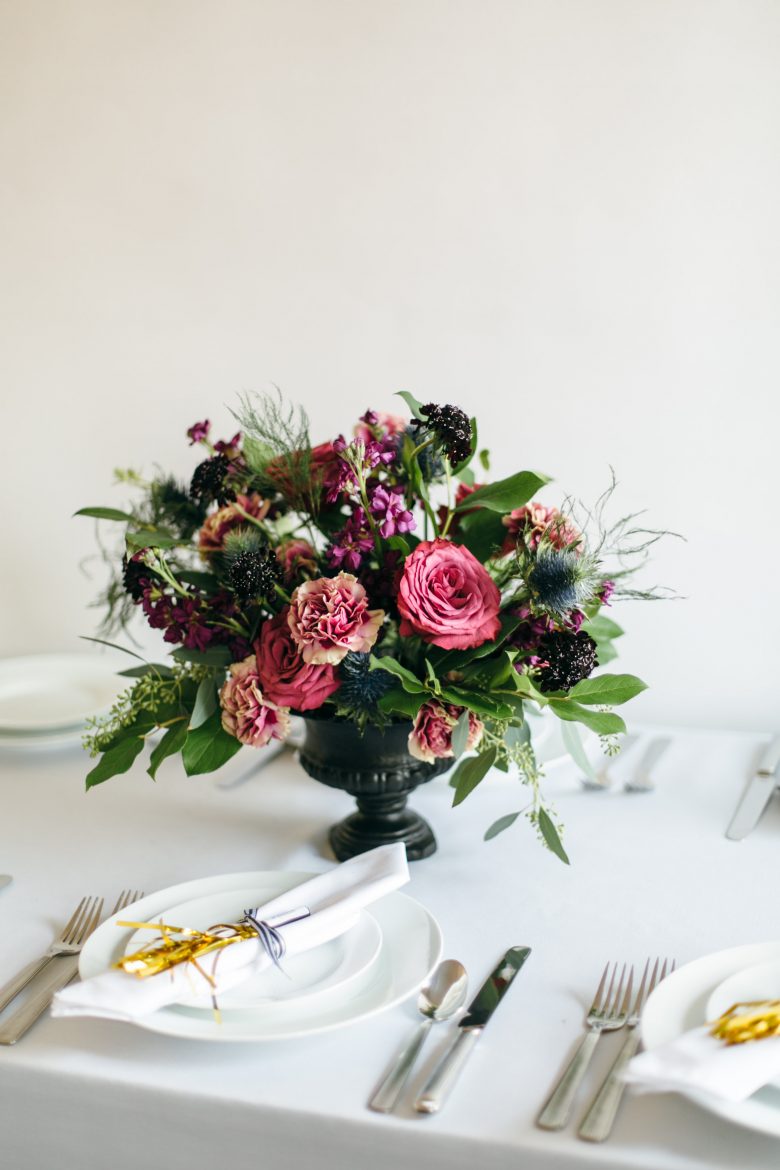
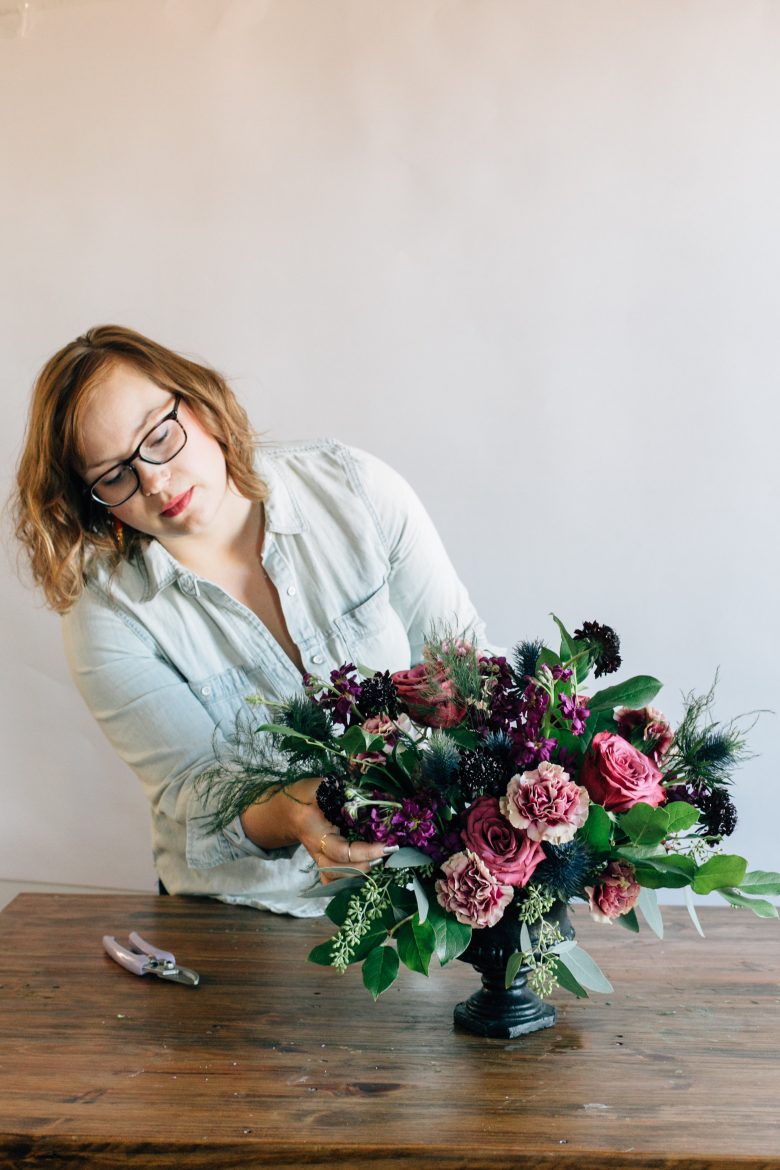
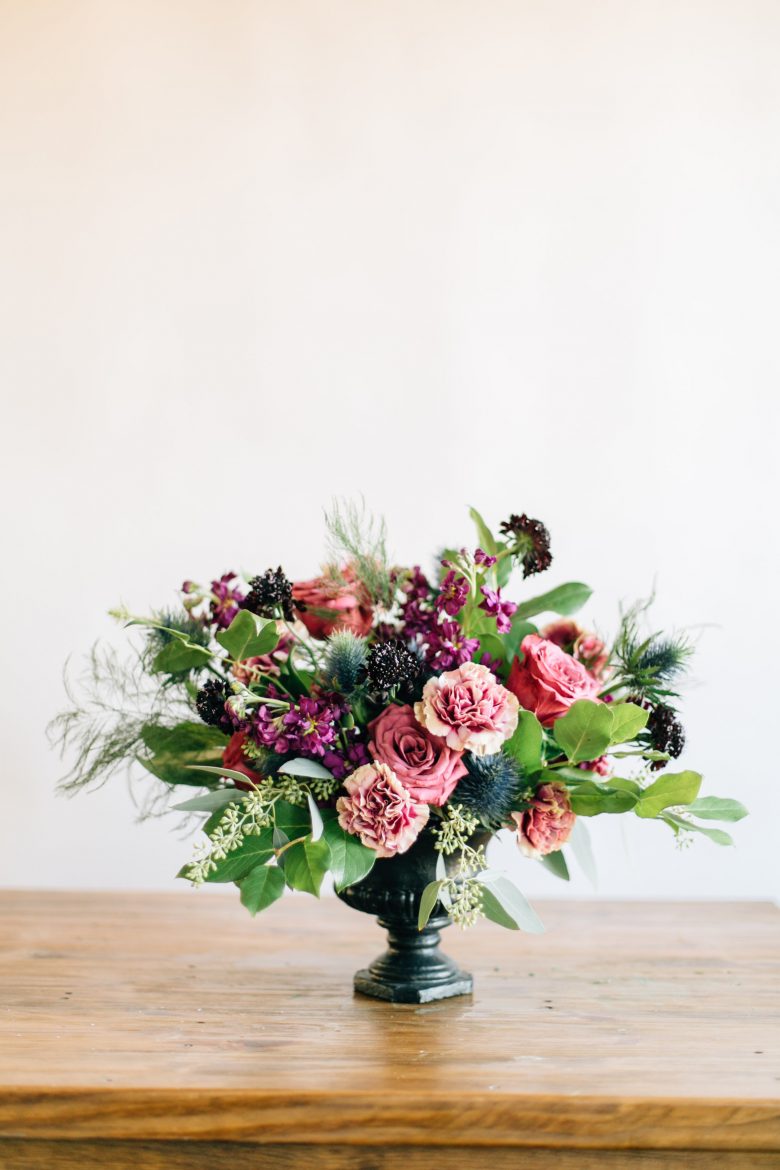
And that’s where we come in. We wanted to tackle the urn, because it’s pretty timeless, and also normally done in ways that seem to cost a million dollars. So we asked our favorite wedding stylist, Michelle Edgemont in Brooklyn, if she could make a $7.99 plastic urn… well, cool. And it turns out, of course she could. So for those of you stuck in ballrooms, or who just like tuxes, here is a doable, affordable, kinda fancy floral arrangement. Here, we’re putting an emphasis on flowers that are readily available, impactful, and aren’t going to completely sink your flower budget. That said, this isn’t a cheap centerpiece (around $80 per centerpiece if you buy wholesale flowers online, compared to the $200-$350 it would cost from a florist), so you will need to have some kind of flower budget. We tried to keep the material prices reasonable, but they ain’t free.
If you’re undertaking this project, remember to get help, allot time for making multiples, and do your bouquets before your centerpieces, because chances are you care more about them, and you want be safe in the knowledge that you have enough flowers for the thing you’re going to hold in your hands. (Michelle also advises that if you plan to buy your flowers online, allocate for about 30% more flowers than you need, as some will inevitably arrive with broken stems and sad looking blooms.)
Here’s what you’ll need:
- Urn
- Roses (7)
- Scabiosa (7)
- Stock (7)
- Lemon Leaf (11)
- Fern (5)
- Carnations (9)
- Seeded Eucalyptus (5)
- Thistle (7)
- Floral Foam
- Waterproof Floral tape
- Bucket
- Water
- Clippers
- Scissors

Steps
1. Prep flowers by removing all of the leaves, cutting the stems on an angle, and placing in room temperature water for twenty-four hours.
2. Prep foam by filling a bucket with room temperature water, placing foam on water, and letting foam slowly soak up water.
3. Cut foam to size to fit inside the urn. Cut smaller pieces to fill in the gaps.
4. To hold the foam in the urn, tape on with waterproof tape.
5. Start with your largest green, the lemon leaf. Place stems all the way around the urn, creating the shape you want your arrangement to be. Put the stems evenly around the urn, some close to the lip and some sticking higher up.
6. Do the same with the fern and the seeded eucalyptus.
7. Now onto the flowers. We’ll start with your main, largest flower, the roses. Cut the stems on an angle and stick into the foam. Place some roses near the lip and some sticking higher up. Spin your arrangement as you work, so each side looks even.
8. Next, move onto the second largest flower, the stock. Start to fill in the gaps all the way around the urn.
9. Do the same with the carnations and scabiosa.
Tips
- If you want to reposition a flower in the foam, recut the stem. Do not reuse a hole you already made in the foam.
- Spin the urn as you work to make sure that it looks great from all sides.
- Make a prototype a few months before your wedding to determine how long will it take you to make one centerpiece, and how many of each flower to do you need per centerpiece.
- Your centerpiece will look best if done the day before the wedding, and kept in a cool, dark place.
- Order thirty percent more flowers than you need to accommodate for broken stems and not so great looking blooms. If you end up with extra, either make fuller centerpieces or create bud vases for cocktail tables and bars.

Editor’s note: If you live in New York and aren’t a fan of DIY, you can always just hire Michelle to make your flowers for you. She’s pretty awesome to work with, if we do say so ourselves.