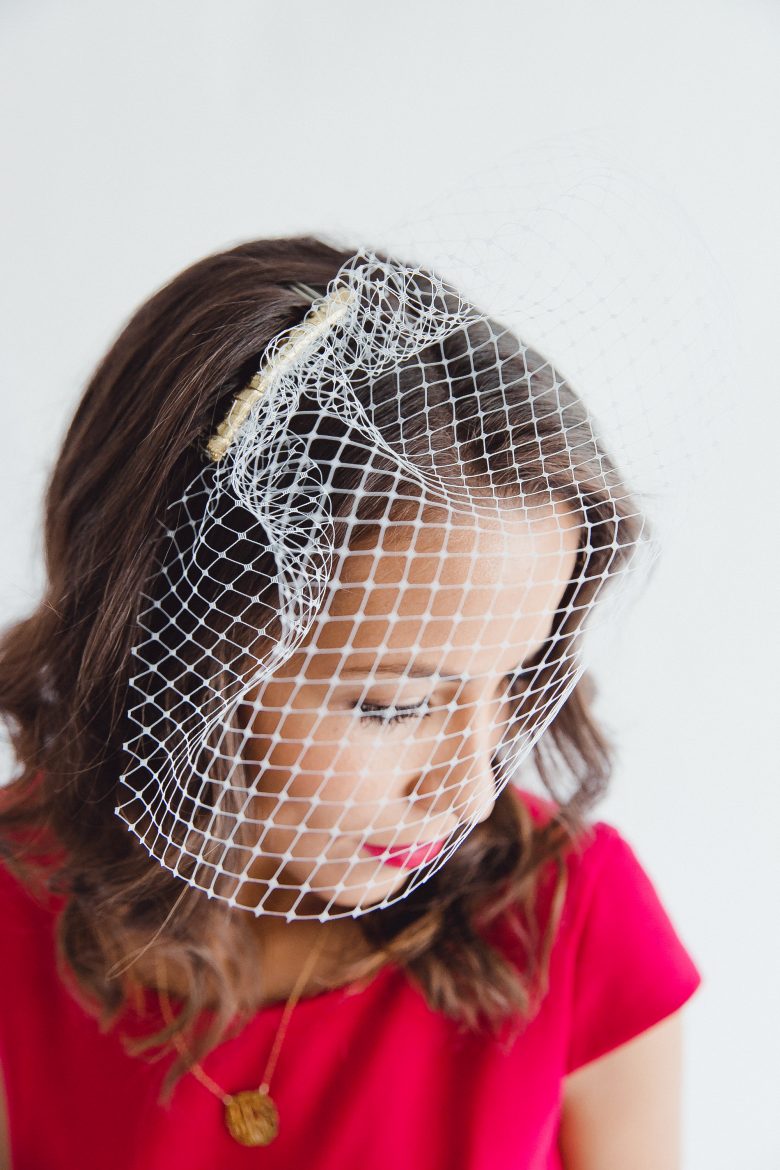
How to DIY a birdcage veil is something I can file under “things I wish I’d known when I got married.
The thing is, birdcage veils are one of those bizarro wedding accessories that costs way more than you’d ever expect to. (In my head? Maybe twenty-five dollars. In real life? Upward of fifty but probably closer to a hundred. Why? Is this tulle made of diamonds?) The good news is, they are super easy to make, and the cheap tulle actually tends to have a bit more volume. So here is our quick and easy guide to making your own cheap birdcage veil, the #lazygirl way:
Materials For Your Birdcage Veil:
- 16–18” of 9” French netting: California Millinery in LA for $2 a yard or on Etsy for $2.25 for 1/2 yard
- 10–12” of awesome 1/4” ribbon, $1–$3
- Thread to match your netting
- Needle
- Scissors
- Embellishments: feathers, rhinestones, flowers or whatever you’re feeling excited about.
- Hot glue–optional if you want to glue your embellishment on to your comb to make it extra fancy.

Directions for making aN Easy birdcage veil:
1. Fold the veil in half and, while it’s folded, trim one corner diagonally. How you cut it determines how your veil will fall across your face, so your best bet is to measure the edge you’ve just cut (while it’s still folded) and make sure it’s hitting your face where you were hoping. It can be end at your forehead, eye, lips, or cover your whole face!
2. Open up your veil, and stitch along the uncut side using the little diamonds as a guide. (You’re effectively creating a drawstring for your veil.)
3. When you get to the end, pull your thread tight so your veil scrunches up, and adjust this length to match your comb. Make sure to re-adjust the way it’s scrunched and where the creases fall before you tie your knot.
4. Wrap the comb with the awesome ribbon (we used a gold one). The easiest way is to start by wrapping it through the teeth on one end and tying a knot. Then continue to wrap it between the teeth and over the top of the comb until you get to the other end, and tie another knot. Now you have some fabric to sew your veil to!
5. Sew your veil to the back of your comb. Don’t worry if it’s messy. Or, if you’ve already reached your sewing threshold, feel free to use some hot glue. Seriously, hot glue has saved many a DIY project.
6. Optional: Hot glue, sew, or clip on your embellishment. Done! Now, go be fabulous.
Modifications For Your Short Wedding Veil:
You can use wider French netting (18”) if you want your veil to cover more of your face. You can also use another type of netting or a different color (I’m partial to metallic gold) for a different look.
Tips & Tricks:
- We like the way synthetic netting looks for this project (and it’s much cheaper), but if you want to use silk netting, just know that it will be much softer and your final veil won’t have as much structure.
- Don’t worry if the back of your comb looks a little messy—no one will ever see it, especially if you plan on using an embellishment (aka camouflage).