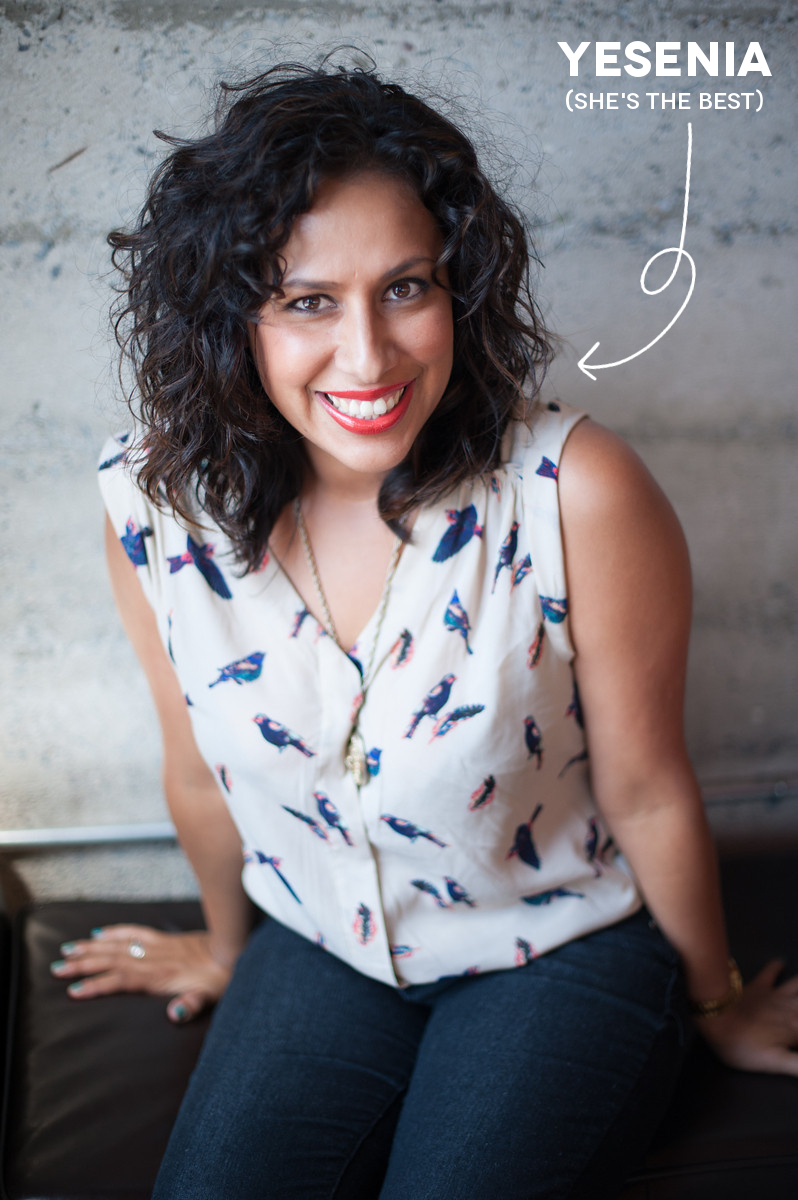
A few weeks back, we gave you all our best info on how to choose hair and makeup artists for your wedding without ending up in a puddle of tears. But for lots of you, the best hairstylist for your wedding is going to be, well, yourself (or that one cousin of yours who does hair kind of awesomely). So we asked our resident stylist Yesenia Guinea of Smoke and Mirrors Salon in San Francisco to come back and show us a few tutorials for braided wedding hairstyles that are easy for you (or that one awesome cousin) to pull off yourself, and pretty enough that nobody will ever know the difference.
Prep Work:
But before you even start on today’s tutorial, you’re going to want to pay attention to these tips from Yesenia on how to prep your hair so that it takes the style the way you want.
First, a note about texture: We’ve all got different hair textures, but whether you’ve got full, curly hair or fine, straight tresses, most of us do not have hair that is style-ready without a little product and some heat (a.k.a. a blow-dryer). So before starting any hairstyle, you’re going to want to prep it. Texturing lets you do two things: it smooths your hair so that you don’t have flyaways around your hairline, but more importantly it gives your hair a little extra grab so that it holds better after it’s styled. (If I’ve got any painters in the room, it’s a little like sanding a piece of furniture before you paint it. You’re going for a smooth surface with just enough roughing up that something will stick to it. Except since you can’t sand your hair, you’re instead going to dirty it a little with product. It may seem counter intuitive to both dirty and smooth your hair at the same time, but hair is weird and you’ll have to trust me on this one.) Here’s what Yesenia recommends to get ready for any kind of hairstyle:
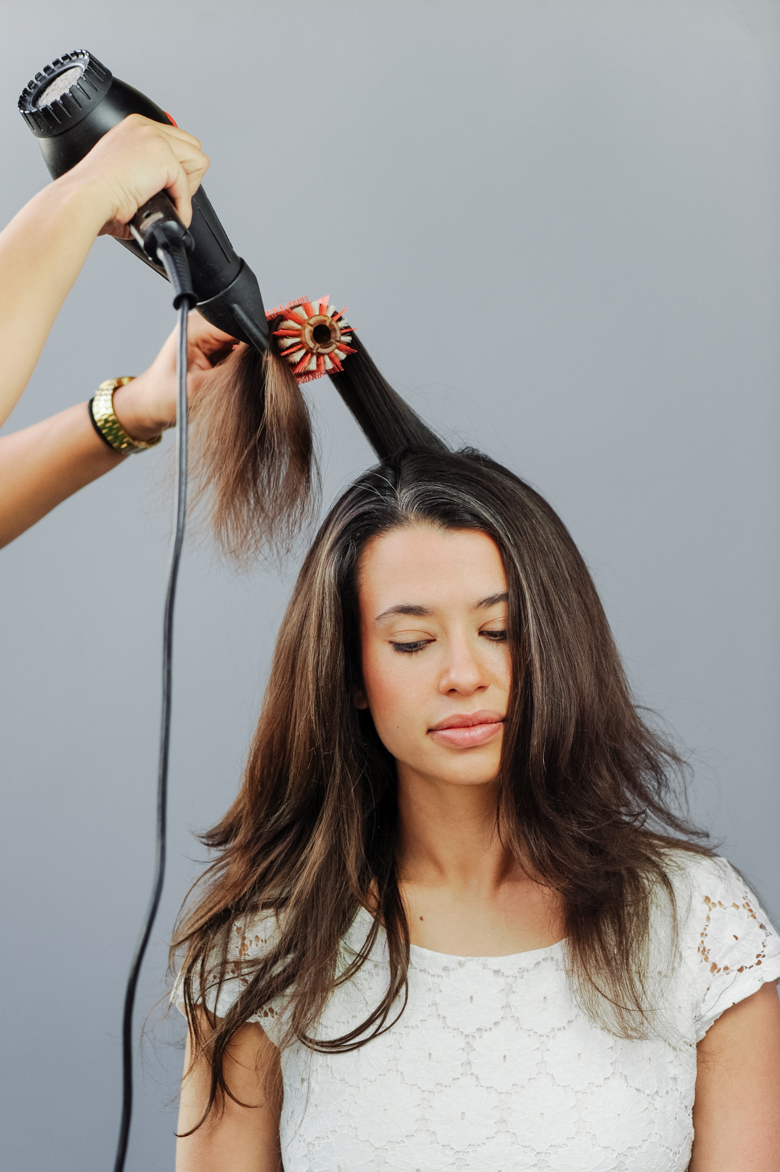
How to smooth and add body:
- First, apply a styling product to your hair that is tailored to heat. There is a whole subsection of products available these days that are formulated specifically for the purpose of prepping your hair before you apply heat to it, and they are magic (if your hair never turns out the way you want when you blow-dry or curl it, applying this stuff first will change the whole game). They usually take the form of a cream or a serum, but the one that is best for your hair will depend on its texture. I use a combination of this Kerastase Nectar Thermique and the accompanying serum when I do my own hair, but your best bet is to talk to your hair stylist at your next appointment to figure out what product works for you. Sticker shock warning: they can be a bit pricey, but I find I use less of the professional products over time than their drugstore counterparts because the formulas are better.
- Next, blow-dry your hair using a boar-bristle brush. The boar bristle will make it easier to smooth your hair, and adds a nice shine to your hair to boot. (For finer hair, use a metal brush to get more fullness.)
- For the best blow-dry technique, start close to your scalp, then pull out with your brush.
- But be careful: you don’t want to go overboard. Too much texture will be difficult to work with (too little will go flat).
Bonus: A note about parts: A part frames your face. Moving it just a tiny bit (less than ¼ inch, even) from the center can add drama and style to your look.
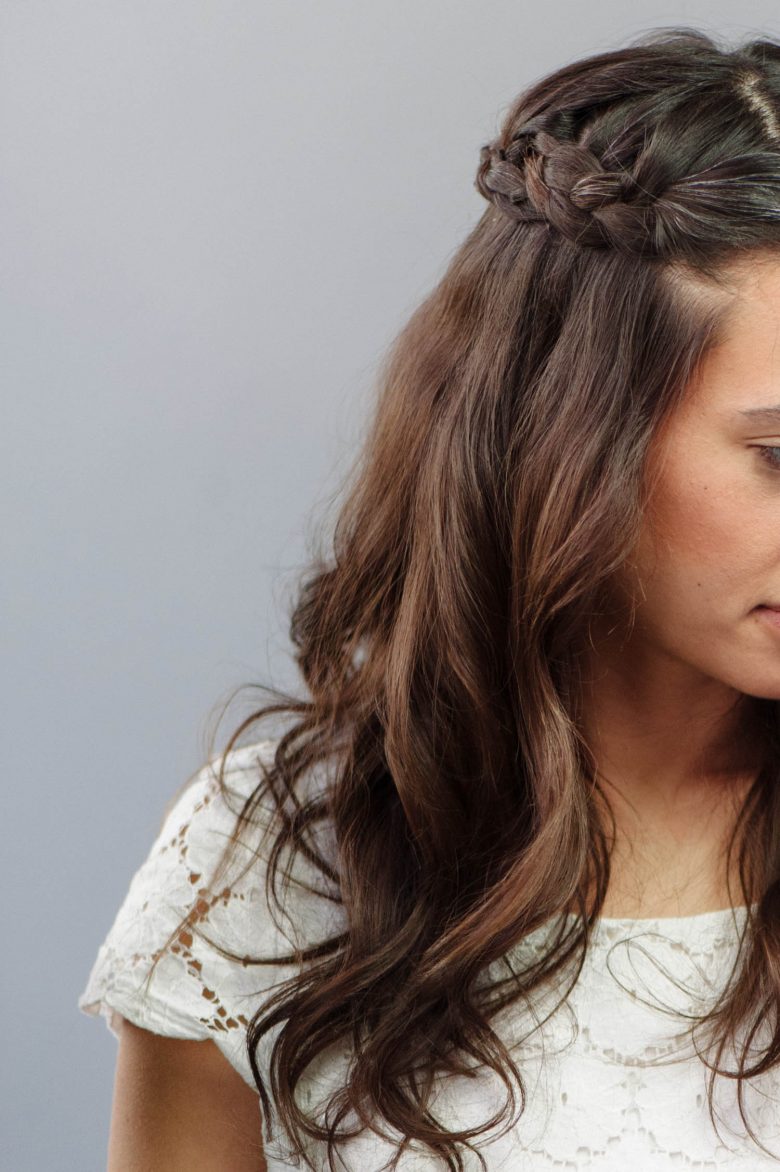
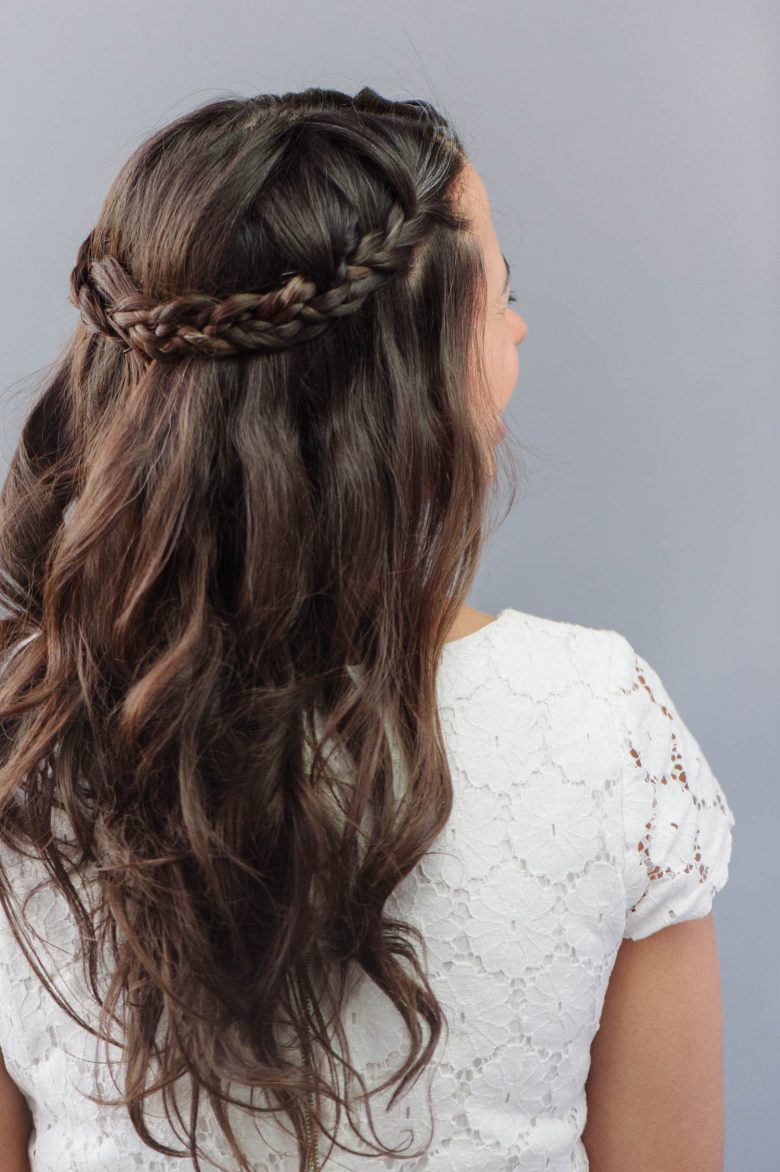
Braids For Beginners
For this hair series, we asked Yesenia to start us off with an easy braided hairstyle that would be friendly to braid beginners, but still look polished and special enough to call it wedding hair (or just fancy enough that you can calm your mom who is freaking out a little bit about you doing your own hair by telling her it’s totally wedding hair).
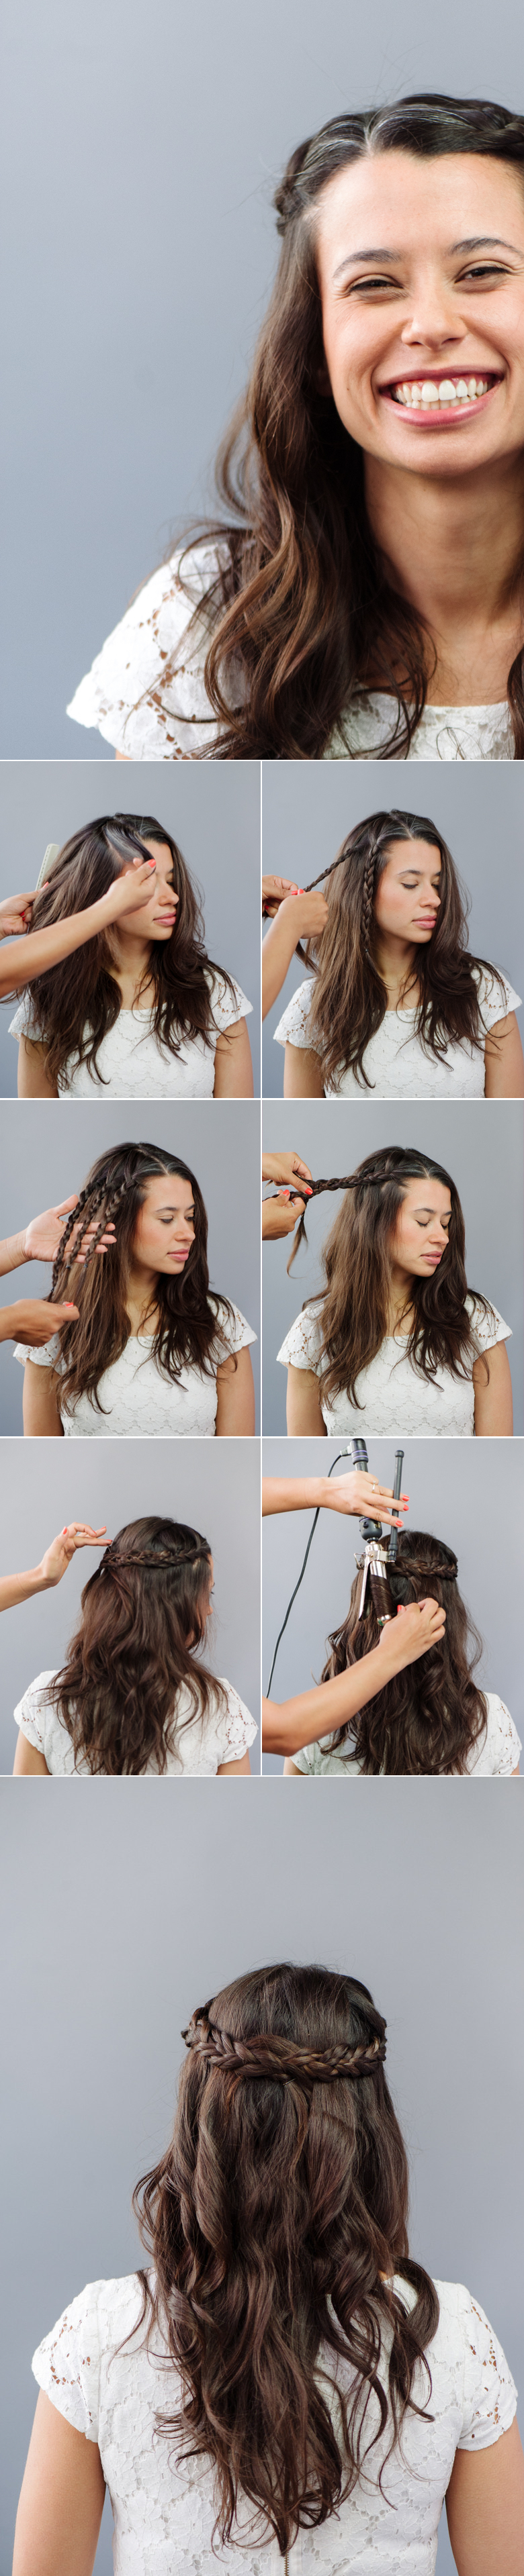
For this look, you’ll want to first make sure that you have a blow-dryer, curling iron (or wand), and brush on hand, as well as some small rubber elastics and bobby pins that match your hair color. Once you have those handy, proceed as follows:
1. Once your hair is prepped (see Yesenia’s tips above), section three chunks of hair along your part, equal in size, parallel to each other. These sections of hair are going to be turned into three braids in just a moment.
2. Secure the back two sections with a clip, then braid the first section of hair and secure with a rubber hair elastic.
3. Braid the second and third sections next, and secure in the same manner as the first.
4. Remove the rubber bands, then braid your three little braids together into one big braid, working toward the back of your head. Secure with rubber elastic. Repeat steps 1–4 on the other side of your head.
5. Pull one of your braids to the back of your head and secure tightly with bobby pins. Then pull your other braid to the back, creating an “X” at the back of your head. Secure with more bobby pins. Then Remove any remaining hair elastics, and secure any loose ends or stray hairs with bobby pins.
6. Create soft waves in the rest of your hair by wrapping one-inch (or so) sections of hair around a curling iron or wand and holding for a few seconds before releasing. (For more tips on how to create soft waves even on the most stubborn of straight hair, head over here.) For a sleeker look, you can also use a curling iron to smooth your hair and curl it under.
Half-up half-down hair is the easiest way to have your cake and eat it too. Add braids and suddenly that cake is ice cream cake (a.k.a. a hundred times more awesome, and why didn’t think you think of it before?). But if you’re not ready to dive into the depths of advanced Pinterest braided hairstyles, start here instead with our user-friendly braided wedding half-updo. You can’t miss.

