
This year the APW staff collectively lost its shit over neon signs (can you blame us?). They were everywhere, they were awesome, and we decided we each needed one of our own, because who doesn’t need a neon sign in their office? (Neon is the new glitter, you heard it here first.) After seeing cheeky neon signs pop up in workspaces and at conferences, I kept eagerly waiting for them to make an appearance at real life weddings (because that’s usually how these things go) until I realized something: neon signs are expensive. Like, can’t even buy on Craigslist expensive. I know, because I’ve tried.
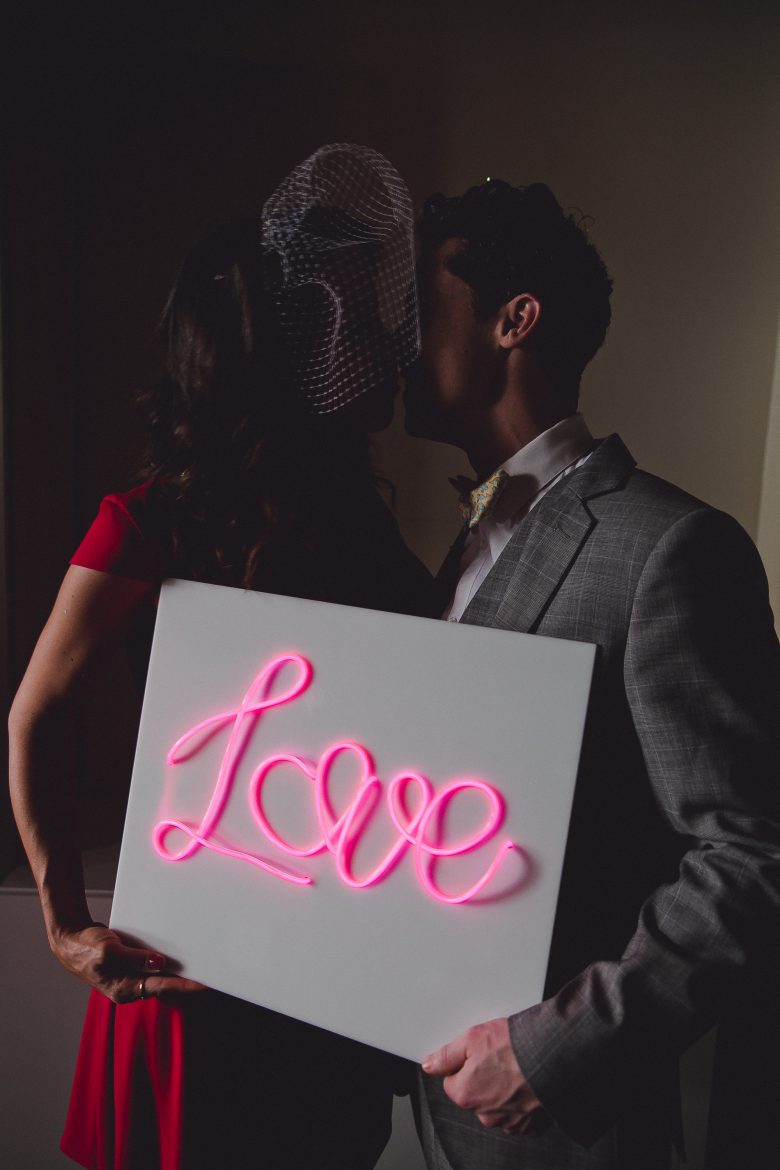
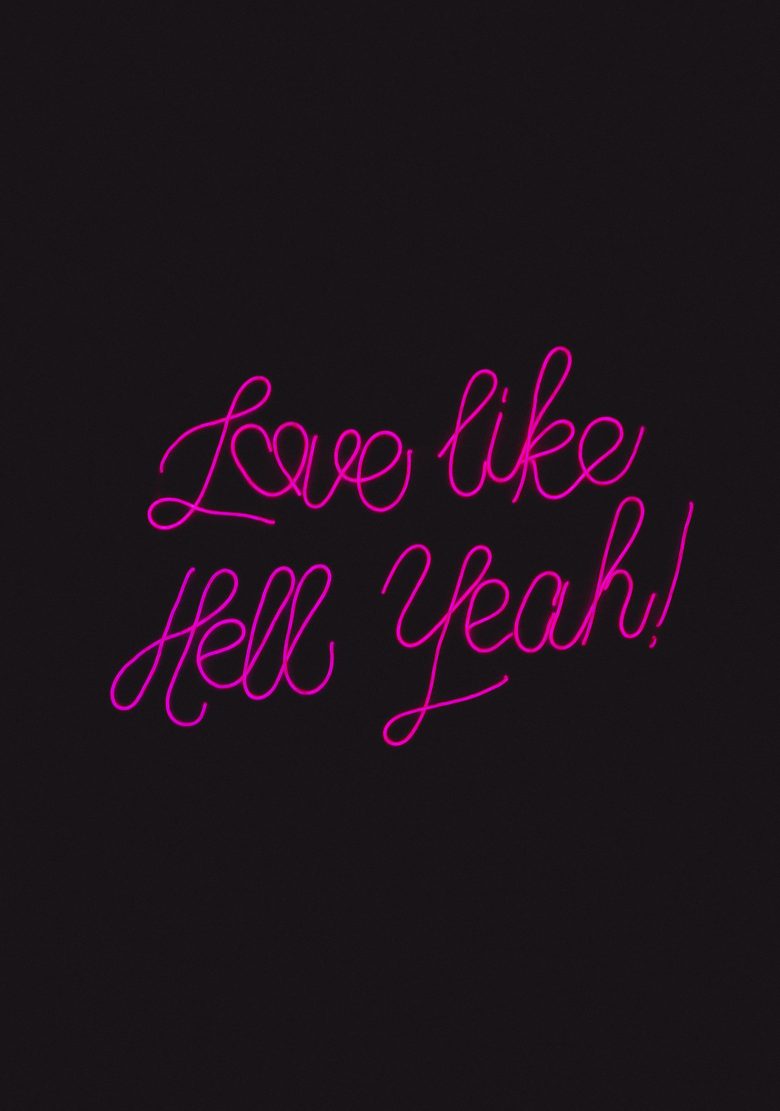
So earlier this year, I made it my personal mission to see if I could figure out a way to… fake a neon sign. Preferably one that doesn’t require a degree in electrical engineering. And a few weeks ago, I found it: a magical little tool called EL wire. If you haven’t heard of EL wire, that’s because it’s typically sewn into fabrics and employed at places like Burning Man (and the occasional Tron cosplay). EL wire is a thin, pliable wire that glows almost exactly like a neon sign, but costs a fraction of the real thing (as in, less than $150 for the big sign). So I begged LA-based wedding designer Tabitha of Winston & Main to see if she could take this awesome EL wire stuff and turn it into something befitting an APW wedding, and the result is way cooler than I ever pictured it. Bonus: it’s totally self-contained, so you don’t even have to plug it into the wall. Double bonus: it would look amazing above a dessert table, just saying.
Before we get started, though, a brief disclaimer: this tutorial doesn’t exactly fall under the #lazygirl hashtag. It is awesome, but it requires a little planning, and a power drill. So give yourself ample time to get it right. That said, you definitely don’t need any special skills for this project. Just some foresight and a little patience.
And, you know, you can have it in your living room for forever. (As if that wasn’t your goal all along.)
EL WIRE SIGN Materials:
- 3′ x 3′ White Acrylic for “Love like Hell Yeah” ($60 from Craig’s Plastics: Go here if you’re in LA—Tabitha says Craig is the nicest.)
- 15″ x 17″ White Acrylic for “Love” ($12)
- 30 ft Pink EL Wire Kit (5mm) for “Love like Hell Yeah” ($62.49)
- 10 ft Pink EL Wire Kit (5mm) for “Love” ($29.49)
- Print of Your Quote
- Chalkboard Marker/Dry Erase Marker
- Loctite Super Glue Ultra Gel Control
- Painters Tape
- Gaff Tape
- Drill with a quarter-inch drill bit

Directions to make “Love” Sign:
1. Print out your word to fit the acrylic. Tabitha prefers Blockposter.com (free!), or you can use Adobe Acrobat’s “poster” printing option to enlarge things at home.
2. Figure out where you will need to drill holes to make your words. The obvious ones, are at the beginning and end of every word or unconnected letter. To figure out where else to drill holes, play with your EL wire (or a piece of string), bending it over your word and seeing where it piles up too much and would be “cleaner” if you could get rid of a bit of the wire (or where it is unable to bend into the shape you need.) So the “obvious” ones in our “Love” Sign are the beginning of the “L”, end of the “e” and beginning of the “o” because it isn’t attached to any of the other letters. Tabitha drilled another hole to connect the “o” to the “v” because it made it easier to read than if there was a third piece of EL wire between the two letters. Mark the places you’ll drill with an “x”.
3. Trace your word or quote on to the acrylic using a dry erase or chalkboard marker. Do a test first to make sure it comes off your plexiglass easily before you write out the whole thing!
4. Drill a hole big enough for your EL wire to fit through everywhere you marked an “x”. Tabitha used a quarter-inch drill bit for her 5mm EL wire.
5. Pull all of your EL wire through the first hole from back to front (at the beginning of the “L”) leaving just the black wire that connects it to the battery pack on the back of the sign. You can secure it with a little piece of gaff tape to keep it in place.
6. Now just trace your word with the EL wire, bending it over itself at the curves and securing them with a couple drops of super glue gel. You’ll have to hold it in place for a minute or two until it sticks and then you can use a piece of painters tape to hold it down while it dries completely (about ten minutes). I found it best to walk away and do something else for those ten minutes and then come back and do the next curve.
Pro Tip from Tabitha: If you wipe away the writing writing as you go, it makes it easier to to remove all the writing (which will be more difficult to get off if you wait until the end and try to go back and get under your letters). Tabitha used little pieces of tape to mark where her letters should go.
7. Continue gluing your EL wire at all the curves and loops (you will start to tell where it naturally meets the plexiglass when you bend it, and that’s where you want to glue it) and whenever you come to one of your holes, drop the EL wire to the back of your plexiglass, then pull it through the next hole and continue.
8. When you get to the last letter, drop the EL wire through to the back of your plexi and flip it over. You can cut off the extra EL wire now—just snip it with regular scissors!
9. Wrap any extra EL wire on the back with gaff tape. (Tabitha used black because she had some on hand, but white would work too.) This step ensures that you don’t see these “extra” bits shining through when the sign is lit up.
10. Plug in the battery pack and tape it to the pack of the sign!
Modifications:
EL wire kits come in all different sizes, colors, and lengths, so you can really go nuts here and make whatever you can imagine! (Tabitha is planning on doing portraits next, which I can’t wait to see.) You can use a different material for the base of your sign too. Wood would work much like plexi, or you could use canvas and sew the EL wire right through it rather than drilling holes.
Tips & Tricks
Most EL wire (but especially the 5mm EL wire Tabitha used) cannot bend to ninety-degree angles—so take that into account when choosing a font or image to create. The smaller EL wire (2.6mm) can get much closer to a ninety-degree angle, but you’ll want to experiment because forcing it can cause a black spot at the bend. Also, don’t be intimidated by the drill or the EL wire—with a little practice, they’re both actually really easy to work with. Tabitha suggests getting a scrap of acrylic to practice on (one that is the exact same material as your big piece). It’ll most likely be free or only cost a few extra dollars and it will be totally worth it for the practice.
Test out tricky letters
Some letters will throw you for a loop, like the “k” in “like” (which required 4 holes), but you can use your test acrylic to practice drilling out the letter and to make sure you like how it looks before you do it for real on your bigger piece.
WITH YOUR SCRAP
Practice drilling into acrylic. Go slow. Depending on your acrylic, it’ll heat up and maybe even melt a little as you drill. So you’ll want to brush away any shavings after each hole so they don’t stick to your sign. Test out your glue too (cut a small bit of EL wire and then test it with your chosen glue to make sure actually sticks to your acrylic). Acrylic is tricky stuff to stick; Tabitha told us she tried three different glue options before settling on the super glue gel she recommended for this project. With the glue, you have to be patient—it really does take a minute or two to bond and then another ten minutes or so to be pretty sturdy and it’ll take a whole day before you can tell if it works. You will not be able to get it off if it works, but that’s what you want! Tabitha initially used a different type of acrylic for this project, and had really good luck with 3M plastic glue (a 2 part solution) with that material, so that might be an option for you too. The bottom line: experiment and see what works!

