Here’s the first thing I will say: do not feel pressured by anyone, especially the Internet, to fancy up your invitations to impress your loved ones. When an invitee opens an envelope and pulls out a grandly embellished wedding invitation, sure, they may say, “How beautiful! I can tell they put a lot of time into this. I’m so impressed!” When an invitee opens an envelope and slips out just a simple card inviting them to your upcoming nuptials, they will still clutch their hand to their heart and say, “Oh my God, they’re getting married! I’m already getting teary… Sniffle.” All that matters is that you want to include them.
That being said, embellishing your stationery can be surprisingly easy and affordable. So if you’re the type of person who drools over paper goods, who scrolls endlessly through Pinterest, or just plain loves crafting, then this post is for you. Because there are tons of ways to do so that won’t make your fingers bleed or break the bank. And to make it even easier I’ve created two types of printable belly bands and two types of printable tags.
COMMON SUPPLIES
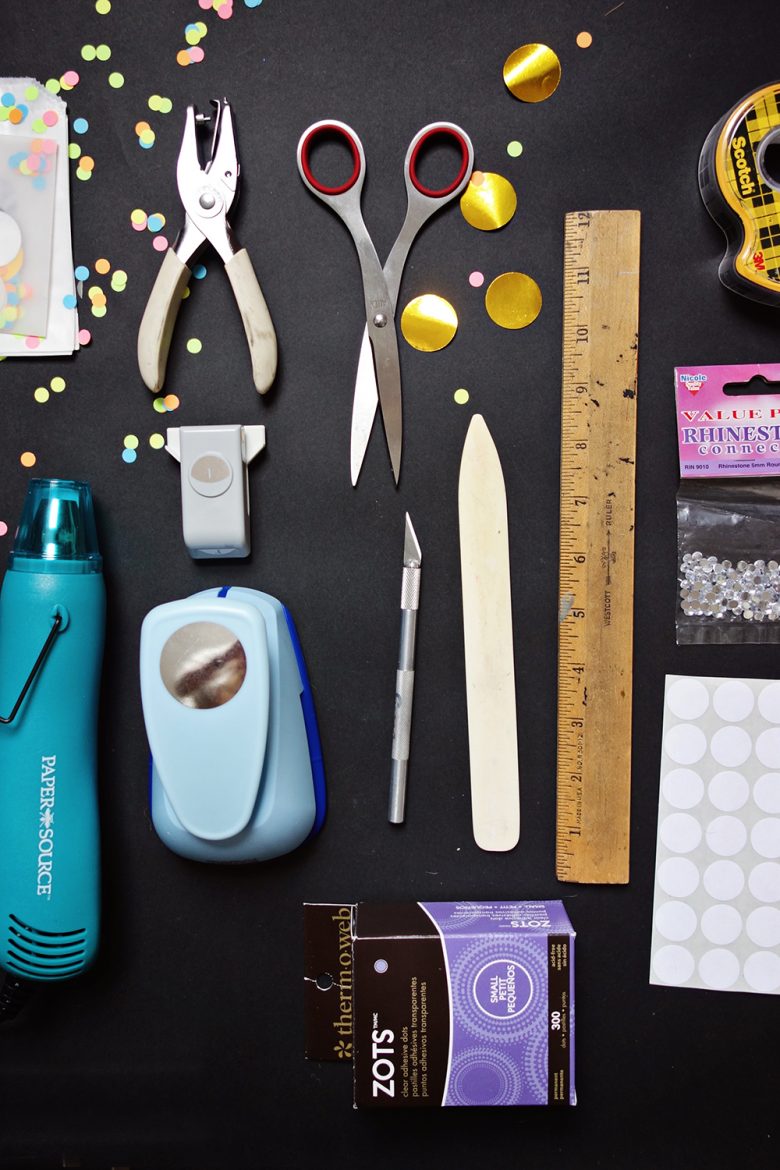
If you’re the crafty type, you might be familiar with a lot of these supplies already, or even own them. If not, go to a craft store and get inspired by the paper and hand punches you see. Don’t be afraid to experiment.
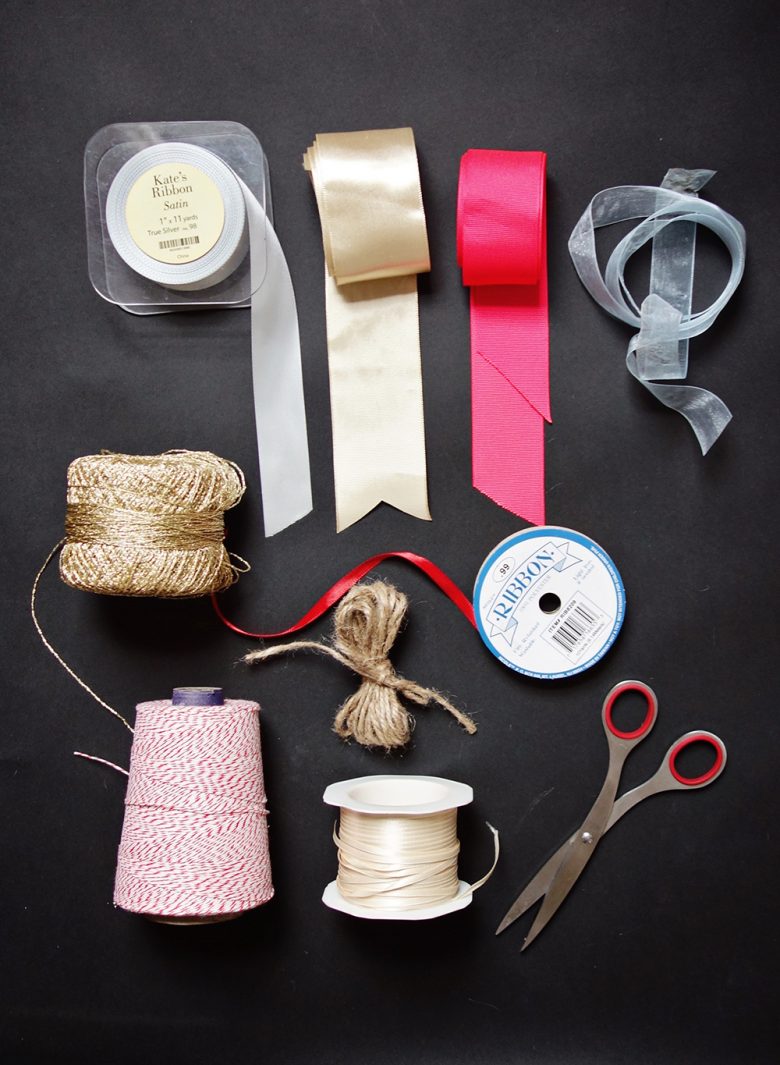
- Variety of ribbons and twine
- Decorative paper
- Circle punch
- Corner punch
- Glitter spray
- Metallic spray paint
- Washi tape
- Good scissors
- Bone folder
- Cutting mat
- X-acto knife
- Glue dots
- Double-sided tape

BELLY BANDS
Belly bands are a traditional way to dress up your stationery a little and hold various cards together. They are incredibly easy to make, and the variations are endless. They are like the perfect little black dress for an evening party, or perhaps the perfect simple clutch that magically fits everything you need.
How to make a paper belly band
- 1. Choose your paper. It should be regular weight paper rather than card stock, to make it easy to fold around your cards. Try out decorative paper, even good quality wrapping paper!
- 2. Cut strips that are 11” long and anywhere from 2” to 4” tall. You can use a paper cutter, rotary cutter, or just an X-acto knife and a ruler. Tip: If using an X-acto knife, always start with a fresh blade, and use a cutting mat if possible. Cutting mats keep your blade sharper than cutting on cardboard (or your table top!).
- 3. Center on your cards and wrap around to the back. Tip: Use a bone folder to make sharp creases on the sides. I’ve had my bone folder for literally twenty-five years. Trust me, this is not the only project you will use it for.
- 4. Adhere with glue dots, double-sided tape, circle stickers, or a glue stick. Tip: Glue dots make it very easy for your guests to remove the belly band.
How to make a ribbon belly band
- 1. Decide on your type of ribbon. A wide satin ribbon gives a luxurious feel, grosgrain a high-end feel (since it’s the thickest and most expensive type of ribbon), thinner satin ribbon a more delicate and fun feel, and twine and baker’s string give a rustic hint. I avoid places like Paper Source and Kate’s Paperie for ribbon, and instead go to Michael’s or A.C. Moore.
- 2. Decide on how you want to wrap it around your stationery. Thinner ribbon and string can be tied in a bow, or wrapped several times around. Wide ribbon should be cut rather than tied in a bow, treated more like a paper belly band.
- 3. Always cut ribbon ends on an angle, to avoid fraying. Use the sharpest scissors you can. You might even consider investing in a pair of high-end Allex scissors—I’ve had mine for over twenty years!
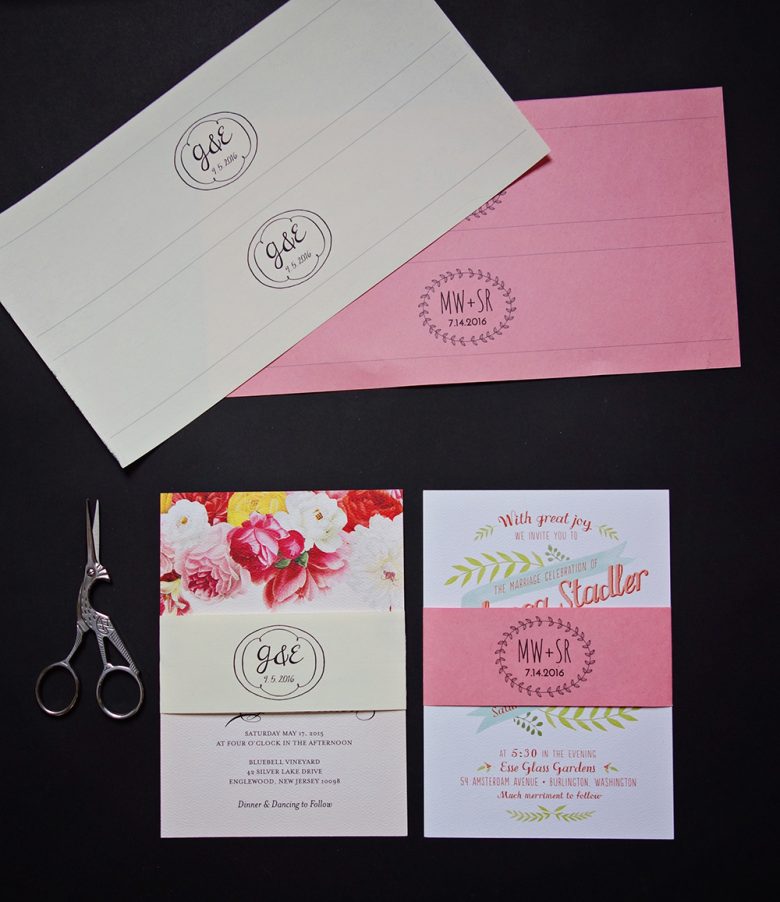
Here are two free printable belly bands that you can customize with your initials and wedding date, to make it extra easy for you!

- 1. Download the template onto your desktop.
- 2. Type in your initials and wedding date into the text fields.
- 3. Print out on 8-1/2” x 11” paper. In the photos I actually use construction paper, which has a lovely weight and softness.
- 4. Cut out, wrap, seal with glue dots or tape, and send!
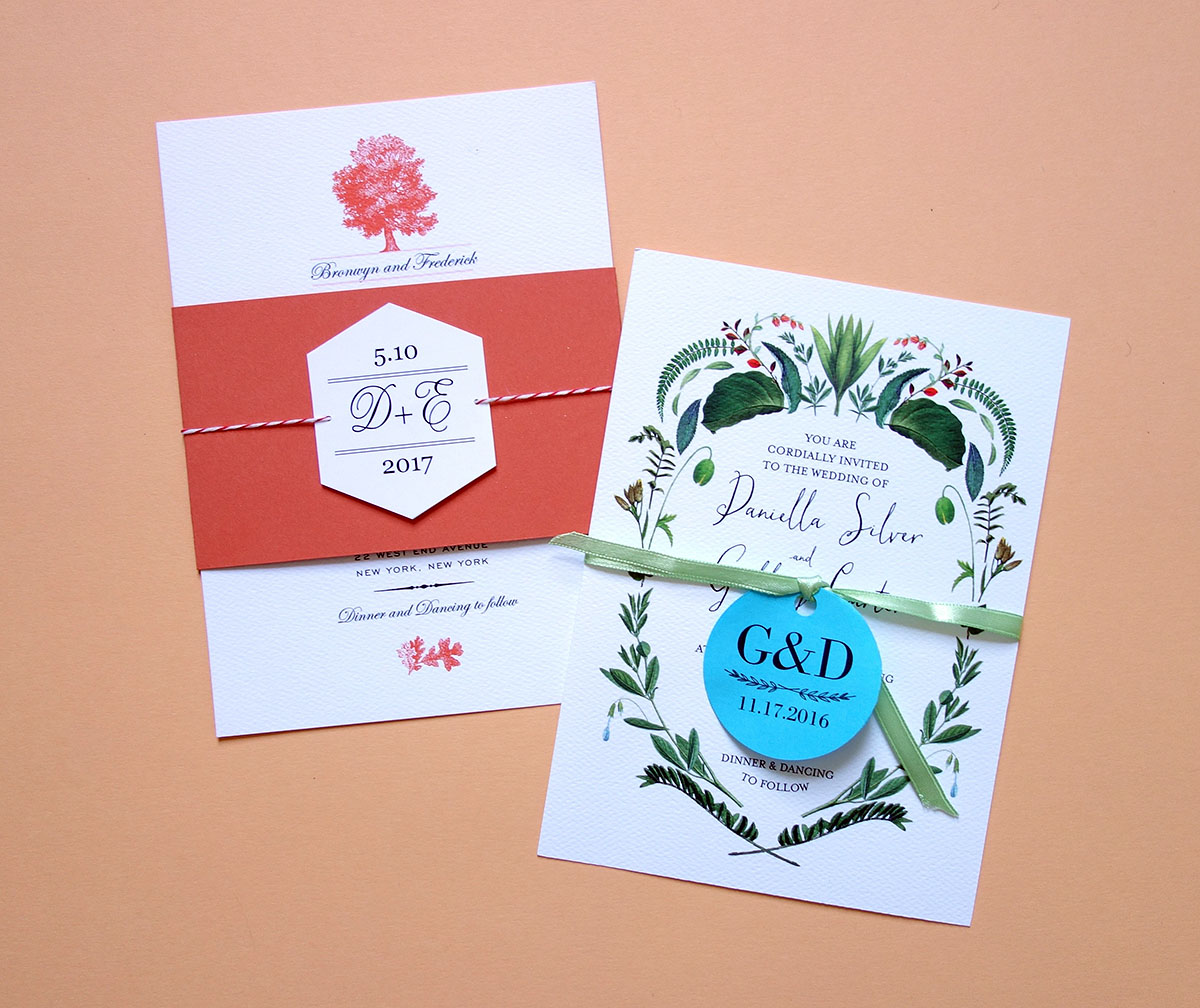
TAGS
Little tags give an extra dimension to stationery; they’re perfect for both formal invitations and whimsical ones. And if you get yourself a circle punch, they are easy as pie to make. You can rubber stamp them with your names or initials, cut out photos of yourselves, attach photos of your location, or put a quote on it (“We hope to see you there!” “We love you and hope you can be part of our celebration.” “Join us as we eat crow and actually get hitched.”)
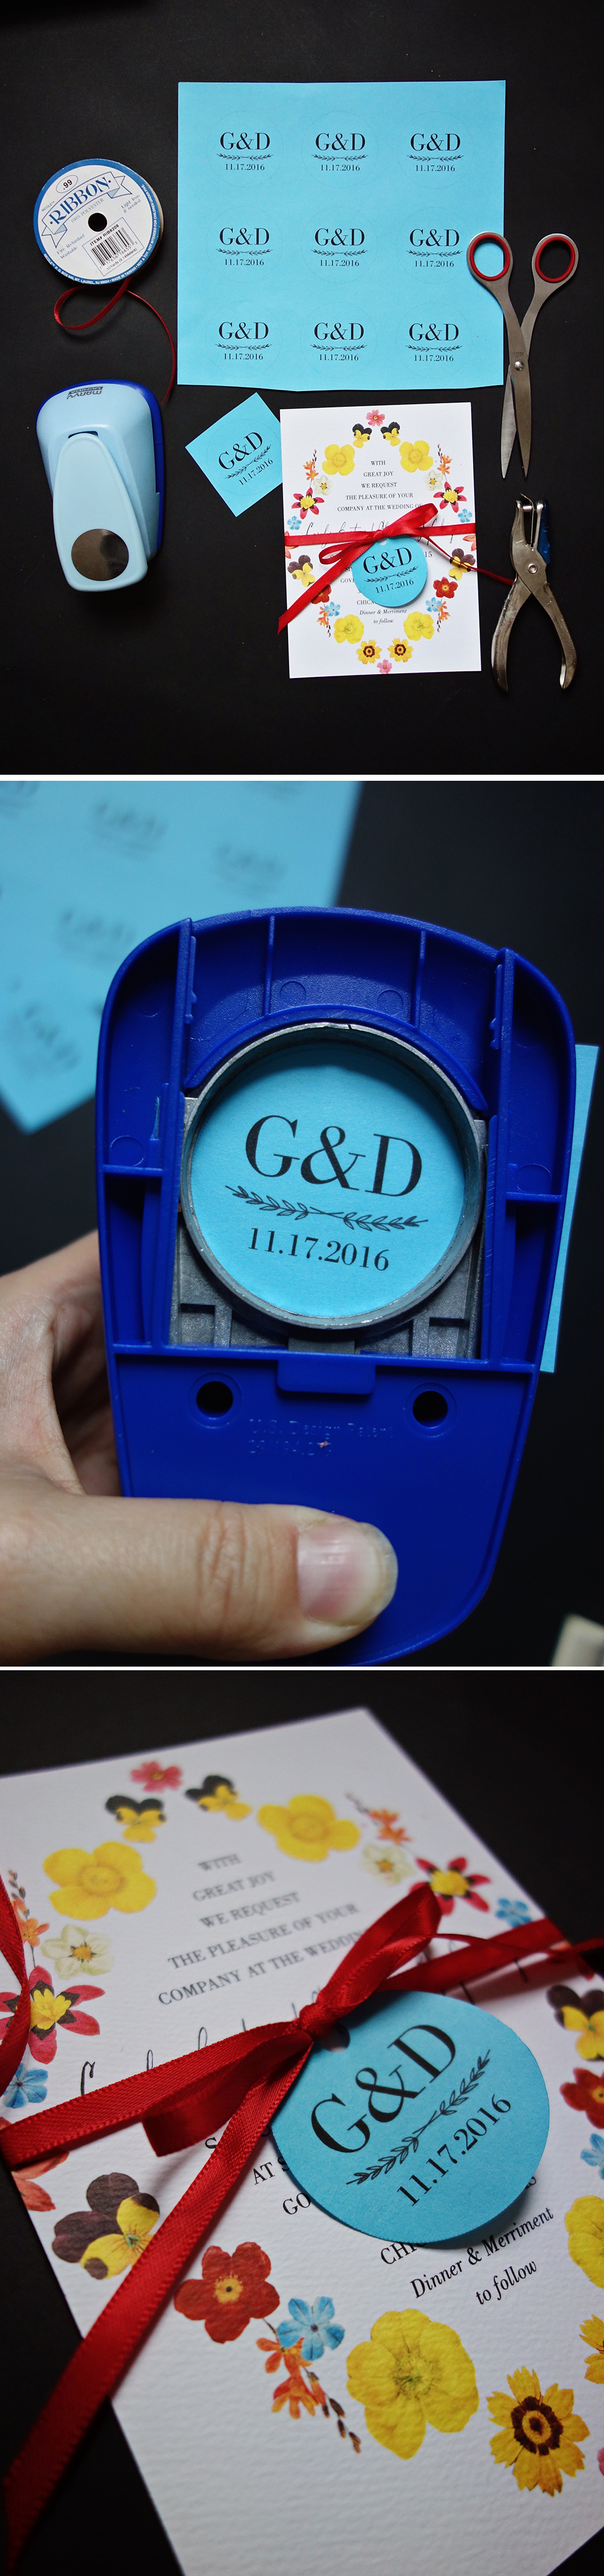
I’ve made two free printables that are very simple to use!
- 1. Download the PDF onto your desktop.
- 2. Type in your initials and date into the text fields.
- 3. Print and cut. The hexagonal one can be cut out with scissors or an X-acto knife, and the circle one can be used with a circle punch. Tip: I recommend a heavier paper for tags to stand up to the postal system.
- 4. Use either a standard size hole punch or smaller hole punch to thread your ribbon or twine through. I used a standard one for the circular tags, and a small one for either side of the hexagonal tag.
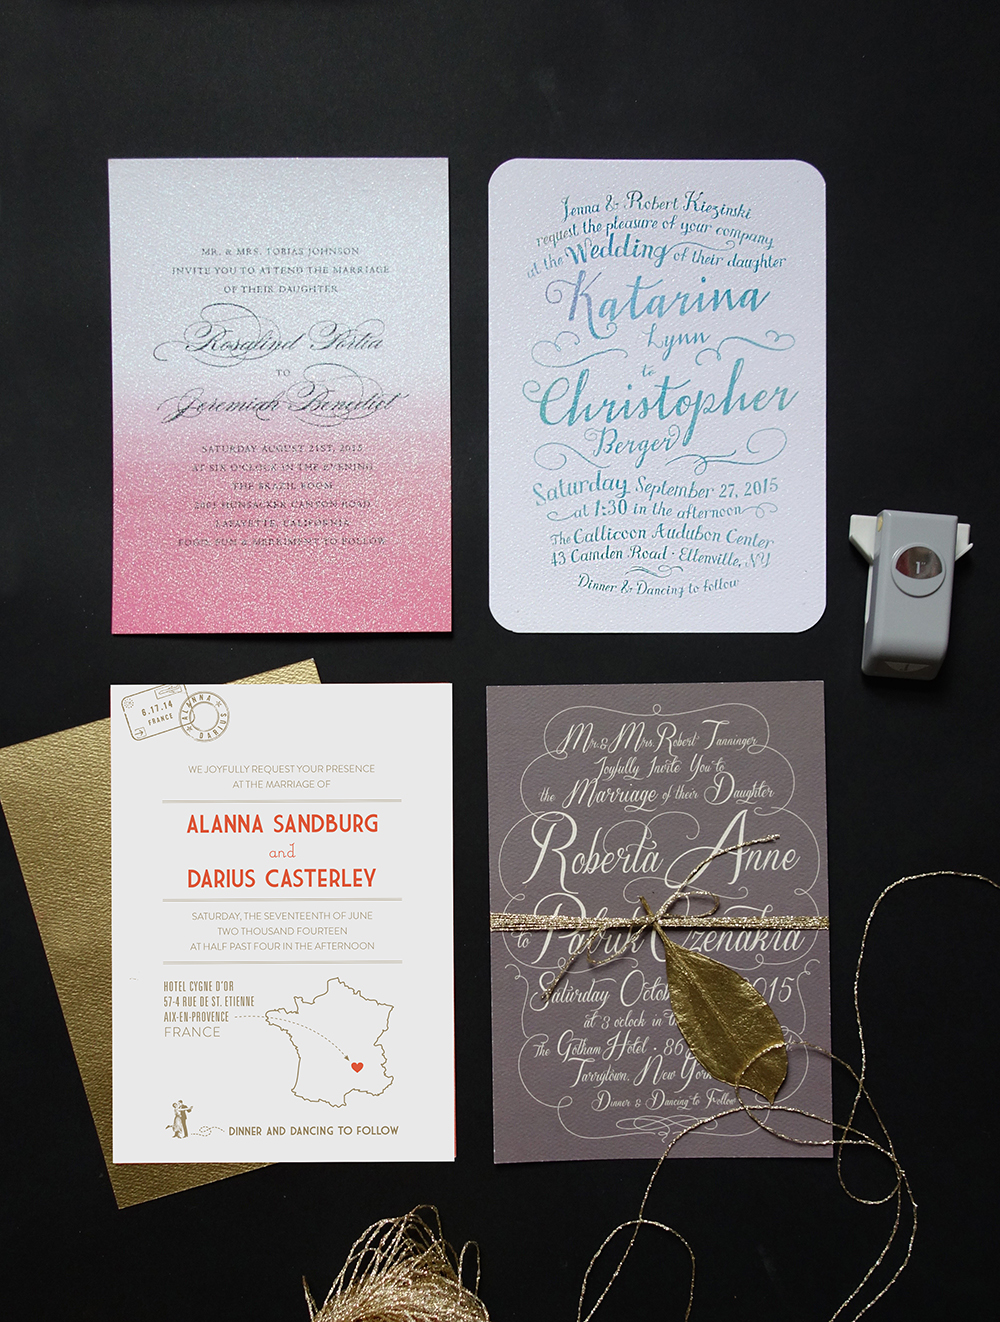
EMBELLISHMENTS
Adding embellishments to your stationery is like adorning it with little bits of jewelry. Bedazzle your invitations with possibilities!
Clockwise from top left:
- 1. Spray your invitation with a sheer coat of glitter. I found the best way to do it was to spray from about twelve inches away, in just two very light passes. You can decide afterward if you need a thicker coat.
- 2. Crop your corners for an unusual look with a corner punch—this one is a simple quarter round punch but there are many other kinds of shapes you can use.
- 3. Tie on little objects (as long as they’re flat enough to go through the mail). Bits of lace, paper cut outs, leaves, twigs, sprigs of pine needles, the possibilities are endless. Shown here is a leaf spray painted gold (DIY instructions below).
- 4. Spray paint the back of your invitation in gold or silver for a truly glam look. Just make sure to air our your invitations for at least a week before mailing, as metallic spray is stank-tastic.
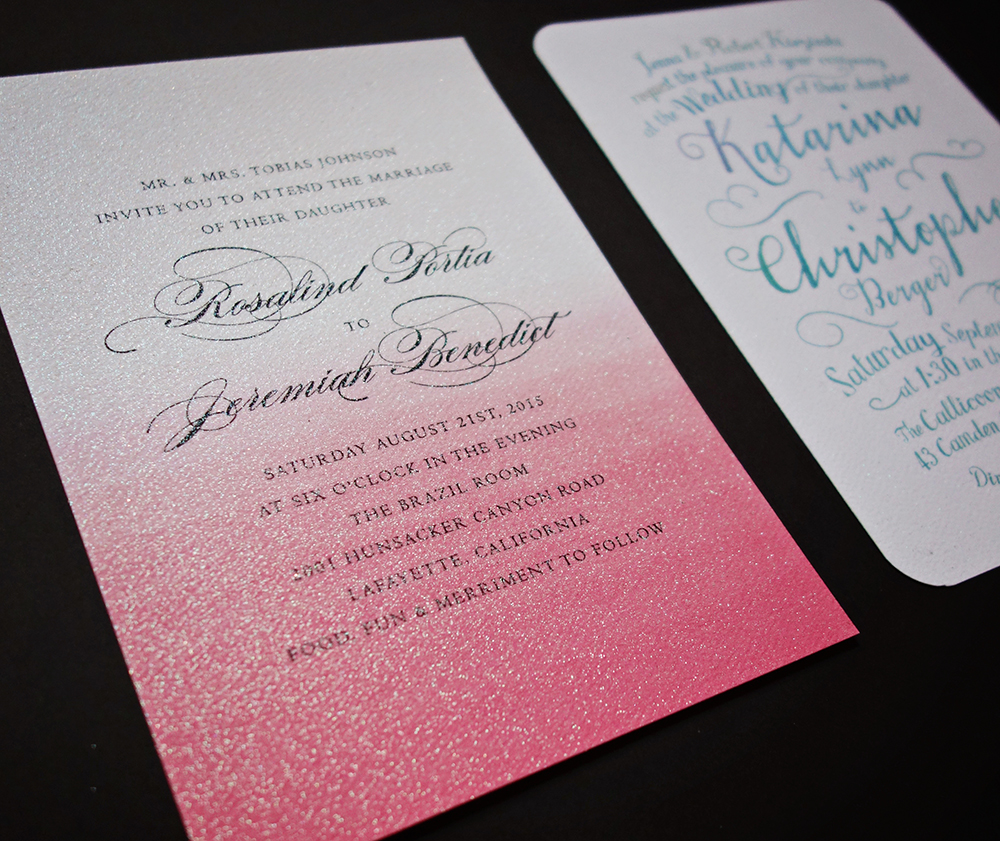
You can make your invitation subtly sparkly or super-sparkly, depending on how many coats you choose to give it. Just remember that Grandma might have a little trouble reading through too much glitter.
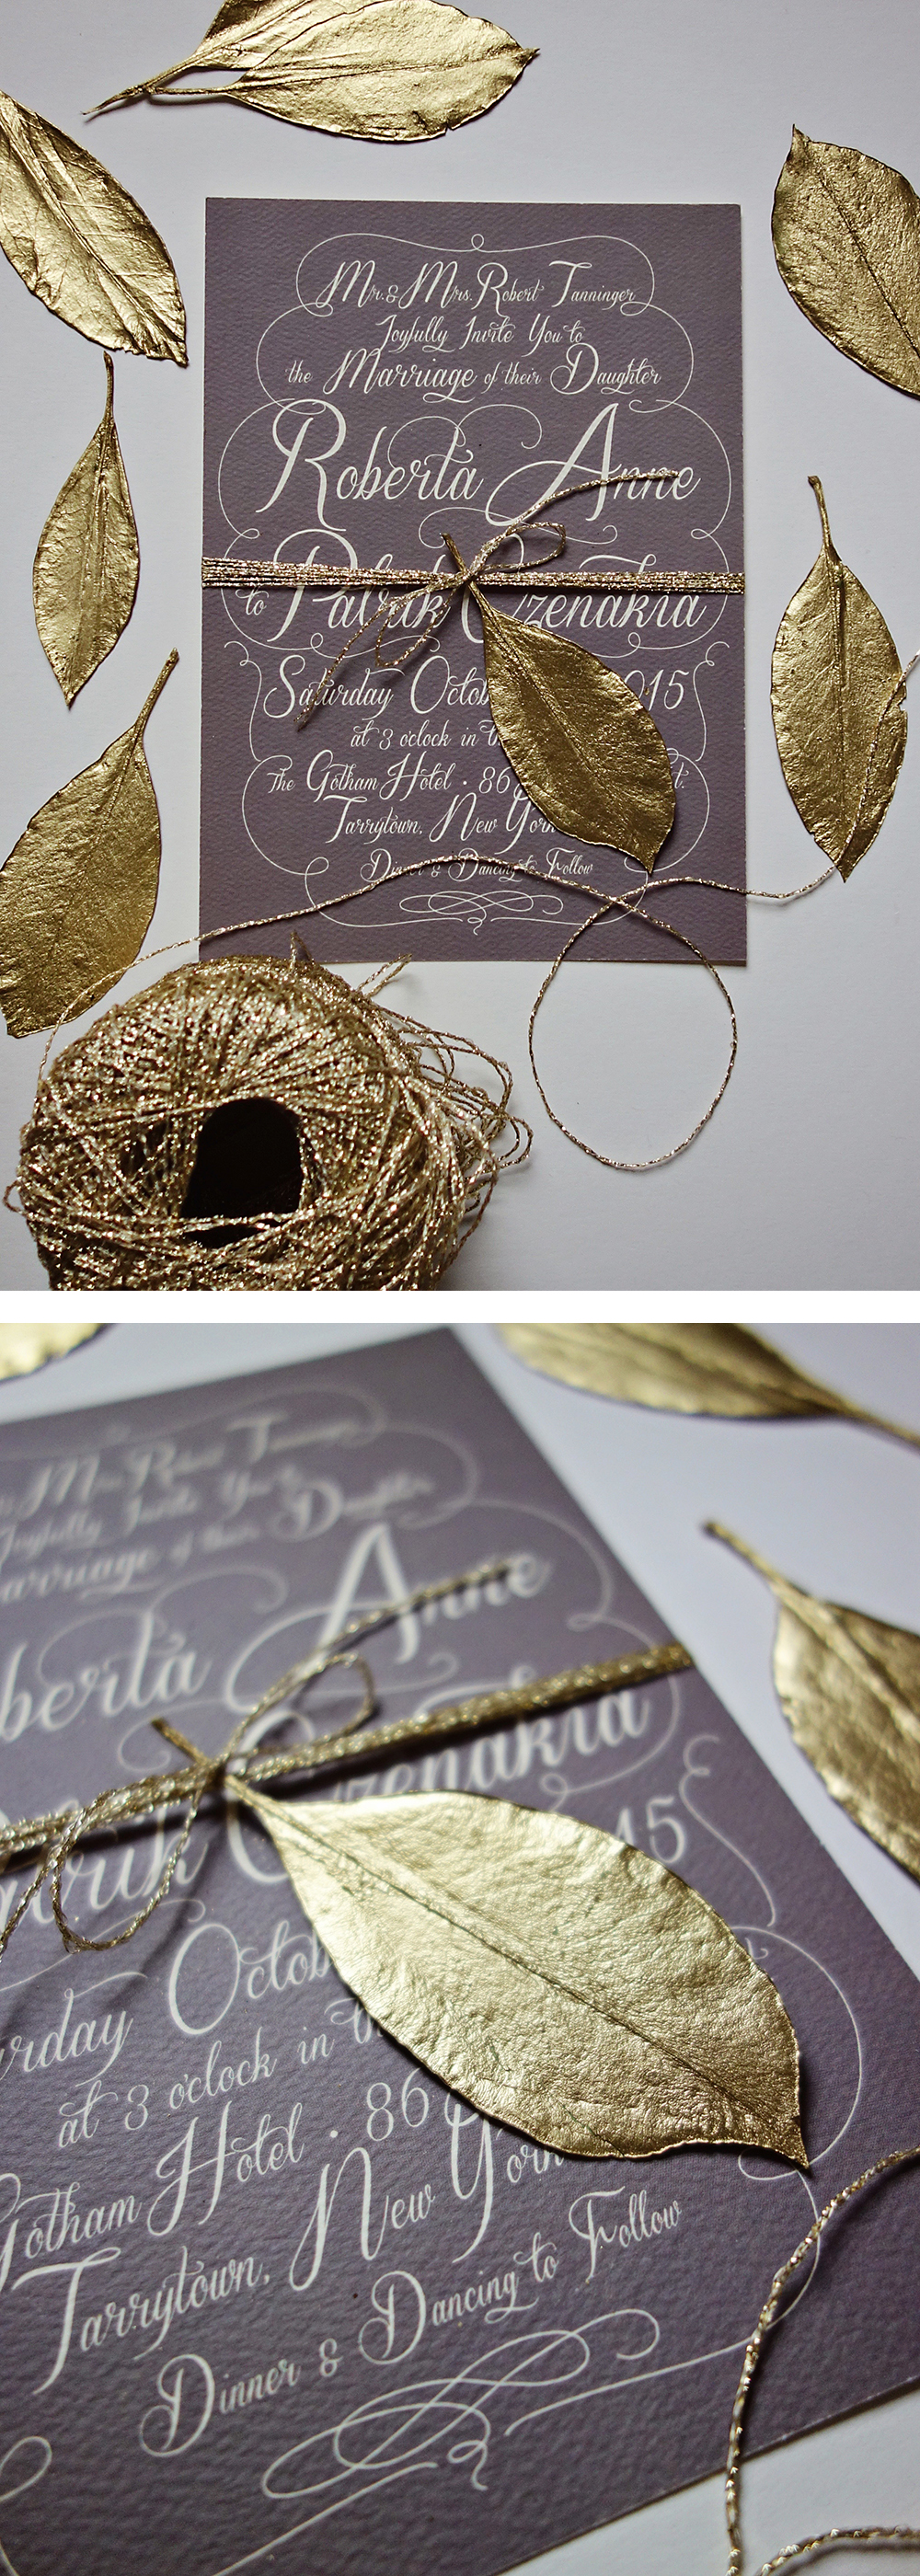
Making gold leaves is incredibly easy.
- 1. Go into your backyard or nearest woodsy patch and find a bush that has nice firm leaves.
- 2. Line up the leaves and spray one side heavily to coat. When dry, flip over and spray the other side to coat. I’ve found that you don’t need more than one coat.
- 3. Once the leaves are thoroughly dry, you can choose to press them flat between heavy books, since curly leaves might crack in the mail.
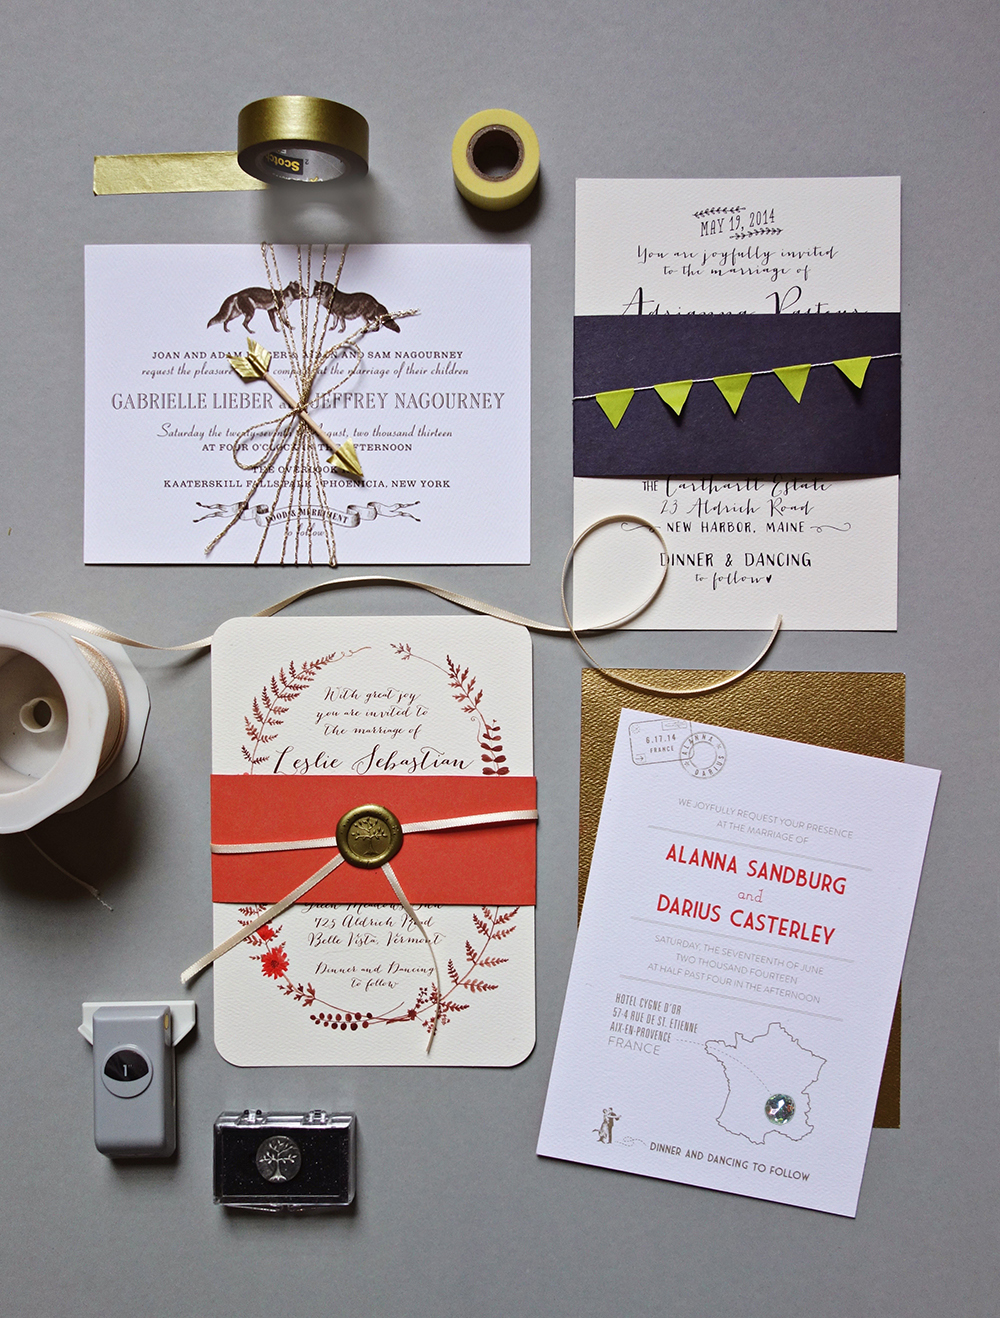
Now, these embellishments are for those who want to take it a step further, who want to add a dimensional detail. They go beyond the little black dress, they are the strappy sequined New Year’s Eve dress. Clockwise from top left:
- 1. Try out some experiments with objects and different ways to tie up your invitation. This little arrow was made from a toothpick and gold washi tape (DIY instructions below).
- 2. Use a plain belly band as a backdrop to garland. There’s tons of pre-made garland on Etsy, but you can also make your own with washi tape flags or circle stickers.
- 3. This invitation not only has a gold back, it has a ¼” rhinestone indicating the location for this destination wedding. Rhinestones don’t have to be tacky!
- 4. Wax seals give things a royal flair. You can purchase initial wax seal kits or an image (like the tree in the stamp shown above). There are also lots of posts online on how to make your own.
![]()
This little gold arrow is an adorable AND affordable decoration, but it’s only for the truly crafty and determined. Supplies are just your favorite washi tape and toothpicks.
- 1. Cut two strips of washi tape, each 1″ long.
- 2. Fold the strips over the ends of the toothpick lengthwise, pressing the tape closed firmly, especially close to the toothpick.
- 3. Use sharp, small scissors to cut the washi tape at one end into a triangle, making sure to leave a tiny bit past the end of the toothpick.
- 4. On the other end, cut out two triangles from the bottom of the tape and two triangles from the top to make the shape as shown. If you want to make it feathery, snip several times down the sides, making sure to not cut all the way to the toothpick.
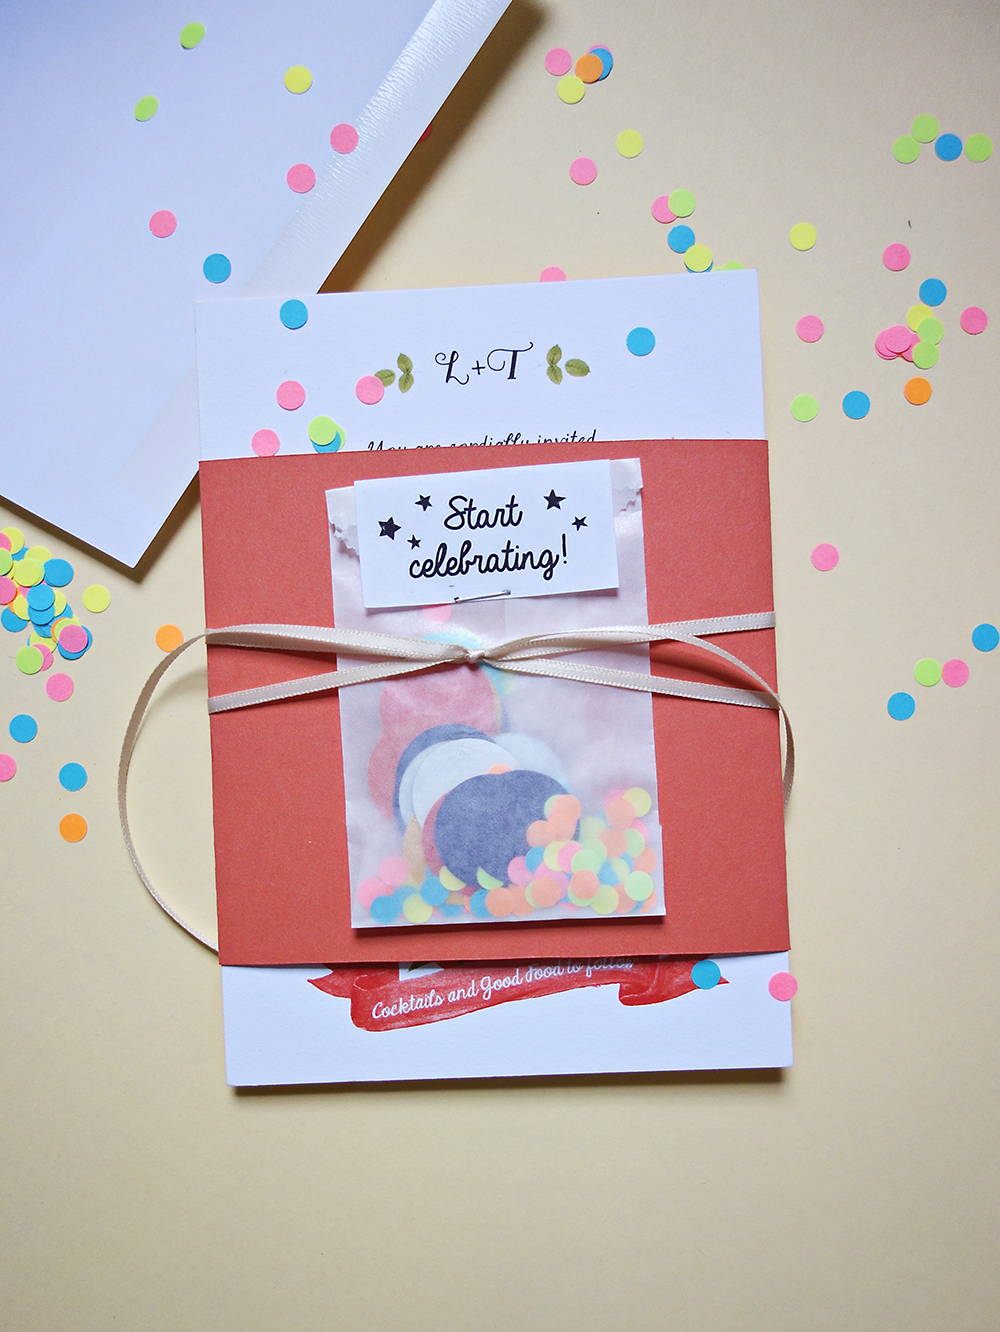
And you can get even more inventive. The sky’s the limit. Here is one final crazy idea for inspiration: start the party early, by enclosing a vellum envelope full of confetti.
Basically, you can go as crazy as you want, or as elegantly simple. Be true to your own personality. If you’re a fun, off-the-cuff person, consider just putting some large confetti into your envelope. If you’re a classic-with-a-twist type, go gaga in the ribbon aisle at the craft store and stroke all that satin and velvet. If you’re like me and love doing little crafts while binge-watching Netflix, then it’s time to get your craft freak on. The stationery world is your oyster.

