Here’s my favorite general rule about wedding decor: don’t put too much time or money into things that people are only going to interact with after they’ve had a glass (or three) of champagne. I know the wedding industry wants you to think otherwise, but at that point, most people are just happy to be hanging out at a party. And well, they’re not exactly paying attention to your carefully crafted decor items. The good news is, table settings (and more specifically, linens) are usually an easy way to add some color to your wedding… and get a great big notice before people are tipsy. Since your guests are going to spend the first few minutes of walking into the reception doing the awkward shuffle where they try to find out what to do next, a lot of them will stop at their tables first, look down and go, “Oh isn’t that lovely.” Which is all you can ever really ask for out of a craft project.
Since table decor is usually a short-lived thing (after that first glance, most people are going to be shoving things aside for food after sitting down), we’re strong advocates for projects that will give you maximum pretty for minimal effort. We saw these super high design neon napkin place settings online last year (for an eightieth birthday party, natch), and have been trying to figure out how to create an easy and affordable version ever since. We asked Brooklyn wedding designer Michelle Edgemont if she could come up with a low-effort hack that would give you all the hip minimal neon awesomeness even if you don’t have a pile of money and unlimited time on your hands (which, sigh, isn’t that always the case?). Here’s what you’ll need:
Supplies:
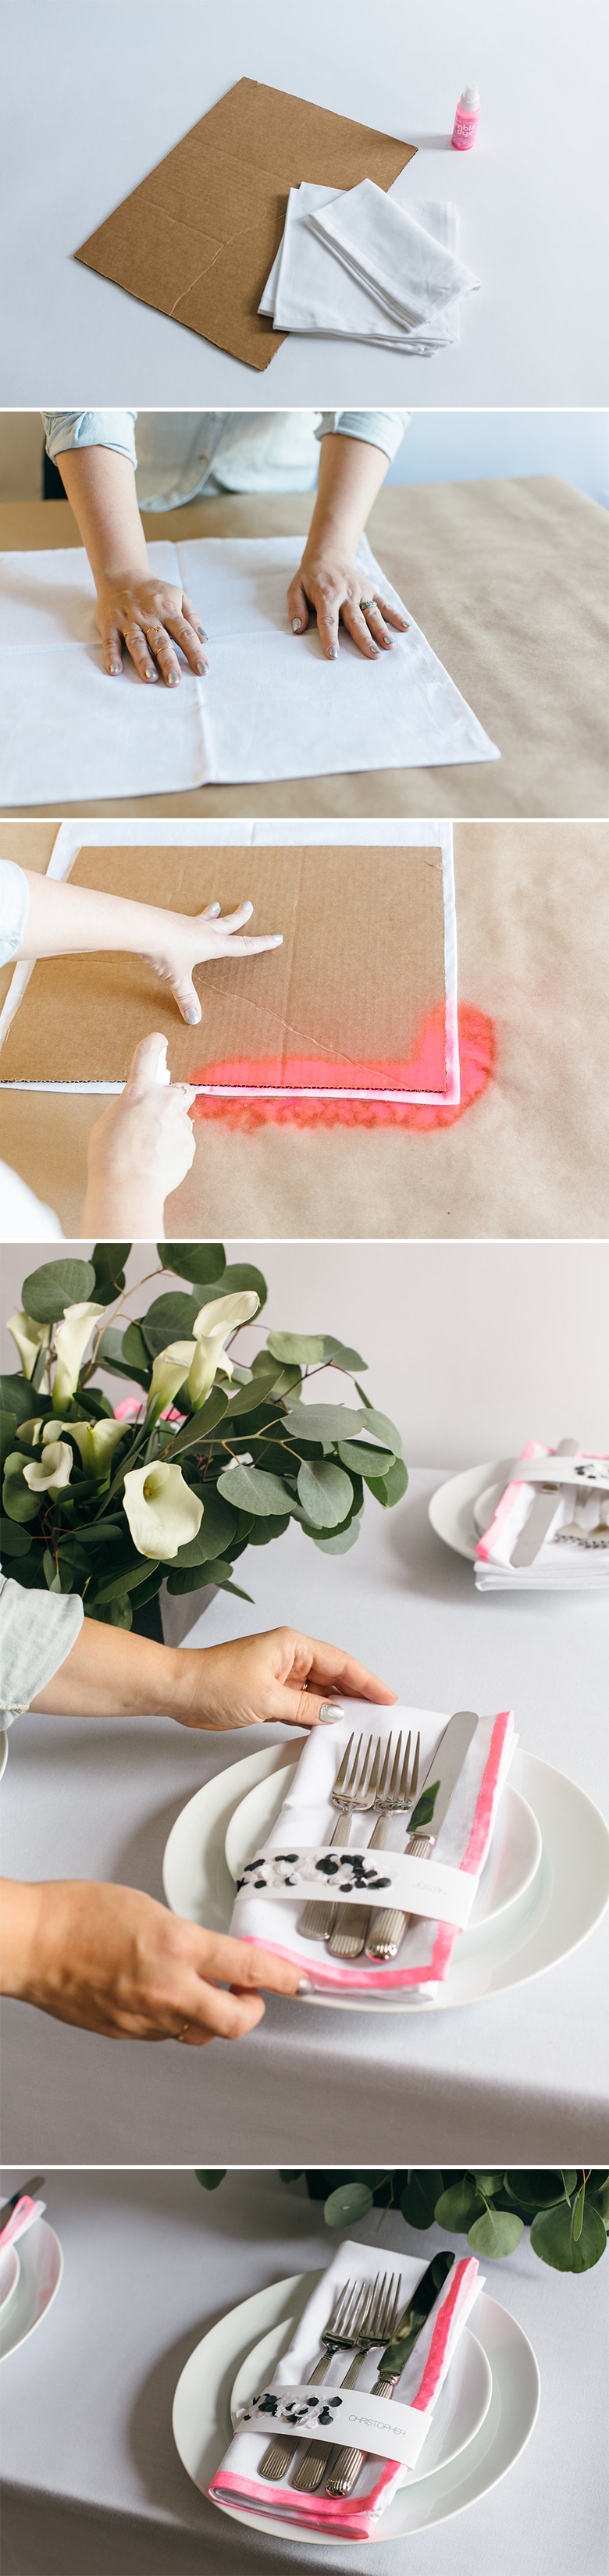
- Kraft paper or newspaper
- White cardstock
- White and black confetti
- White cotton napkins
- A piece of cardboard, at least 15” x 15”
- Double-sided tape
- Neon fabric spray paints
- Scissors
STEPS
- Lay the Kraft paper or newspaper on your work surface to protect it.
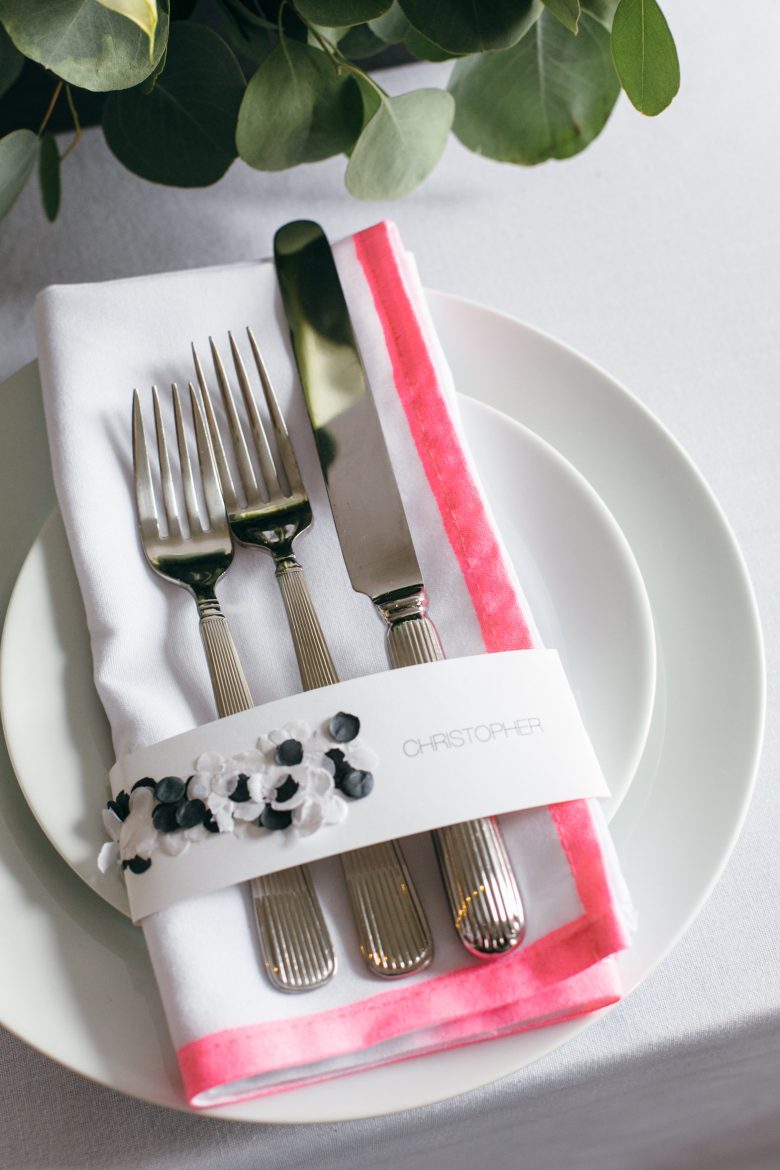
- Lay a napkin flat. You’ll only be spraying one corner of the napkin.
- Place the cardboard on top of the napkin, leaving half an inch of the bottom and right edges exposed
- Spray the paint along the bottom and right edge of the napkin. The whole edge doesn’t need to be painted, but be sure that at least three quarters of the length of it is. That’s a fraction of the work, and a hundred percent of the result: #lazygirl approved!
- Let dry! (For a permanent dye, throw in the dryer for twenty minutes or iron your napkins to heat set the color.)
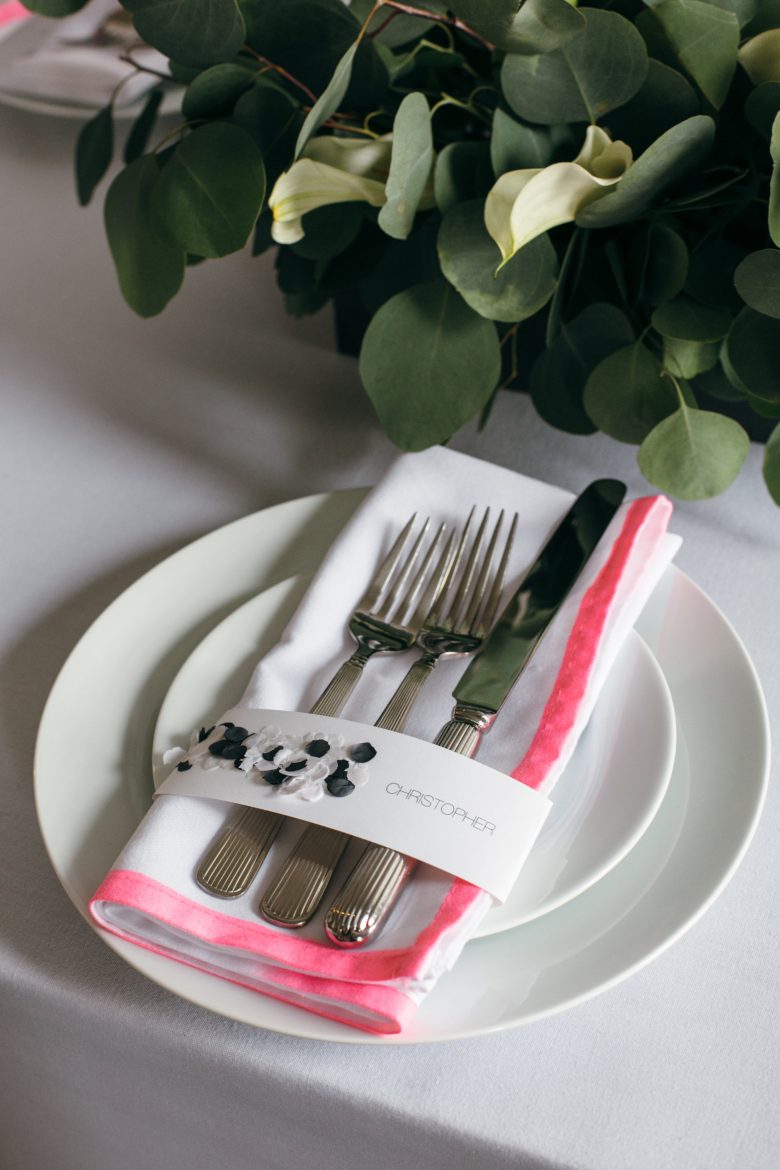
You can totally leave your napkins as is, but if you’re planning on doing assigned seating, this printable wrap place card is quick and easy. Here’s how to make it:
NAPKIN WRAP PLACE CARD
- Download the printable template. Open in Word.
- Type in each guest’s name.
- Print out and cut along the dashed lines.
- Make a pile of black and white confetti on your work surface.
- Put a piece of double stick tape on each place card to the left of the name.
- Dip the place card into the pile of confetti, making sure it covers the double stick tape.
- Wrap around the napkin and tape in the back.

Editor’s note: If you live in New York and aren’t a fan of DIY, you can always hire Michelle to make awesome projects like this for you. I know, magic.

