The Set Up
I’m not crafty in a sew-your-own wedding dress or design-your-own centerpieces kind of way—more in a spreadsheets on Word, tables on flowcharts kind of way. Organized, I guess you’d call that. So, this was the perfect project for me. It was time intensive, but our Seating Chart Photo Display ended up being one of my favorite elements of our wedding.
The Project
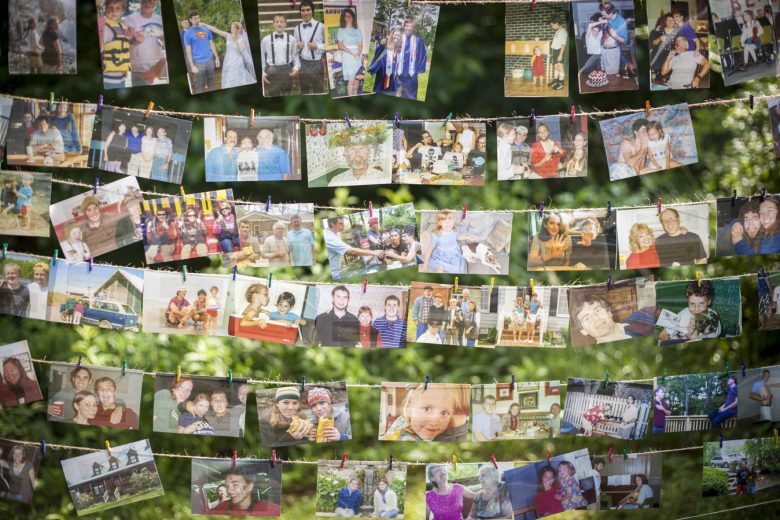
This idea is pretty straightforward: find a meaningful picture for each of your wedding guests and write their table number on the back. Ideally, the picture is of one of you together with this guest. Display all the pictures at the wedding. Guests will find their picture, take it down, and know where they’re sitting, while having a ready-made conversation starter in the form of a picture of you and them. It’s a way to have a photo display of every person at the wedding, but also serves as an opportunity to put up some sweet (in every sense of the word) pictures of friends and family.
What You’ll Need to Make It Happen
- Two poles
- Twine
- Clothespins
- Labels (or a pen)
- A picture of each of your guests (preferably posing with one of you)
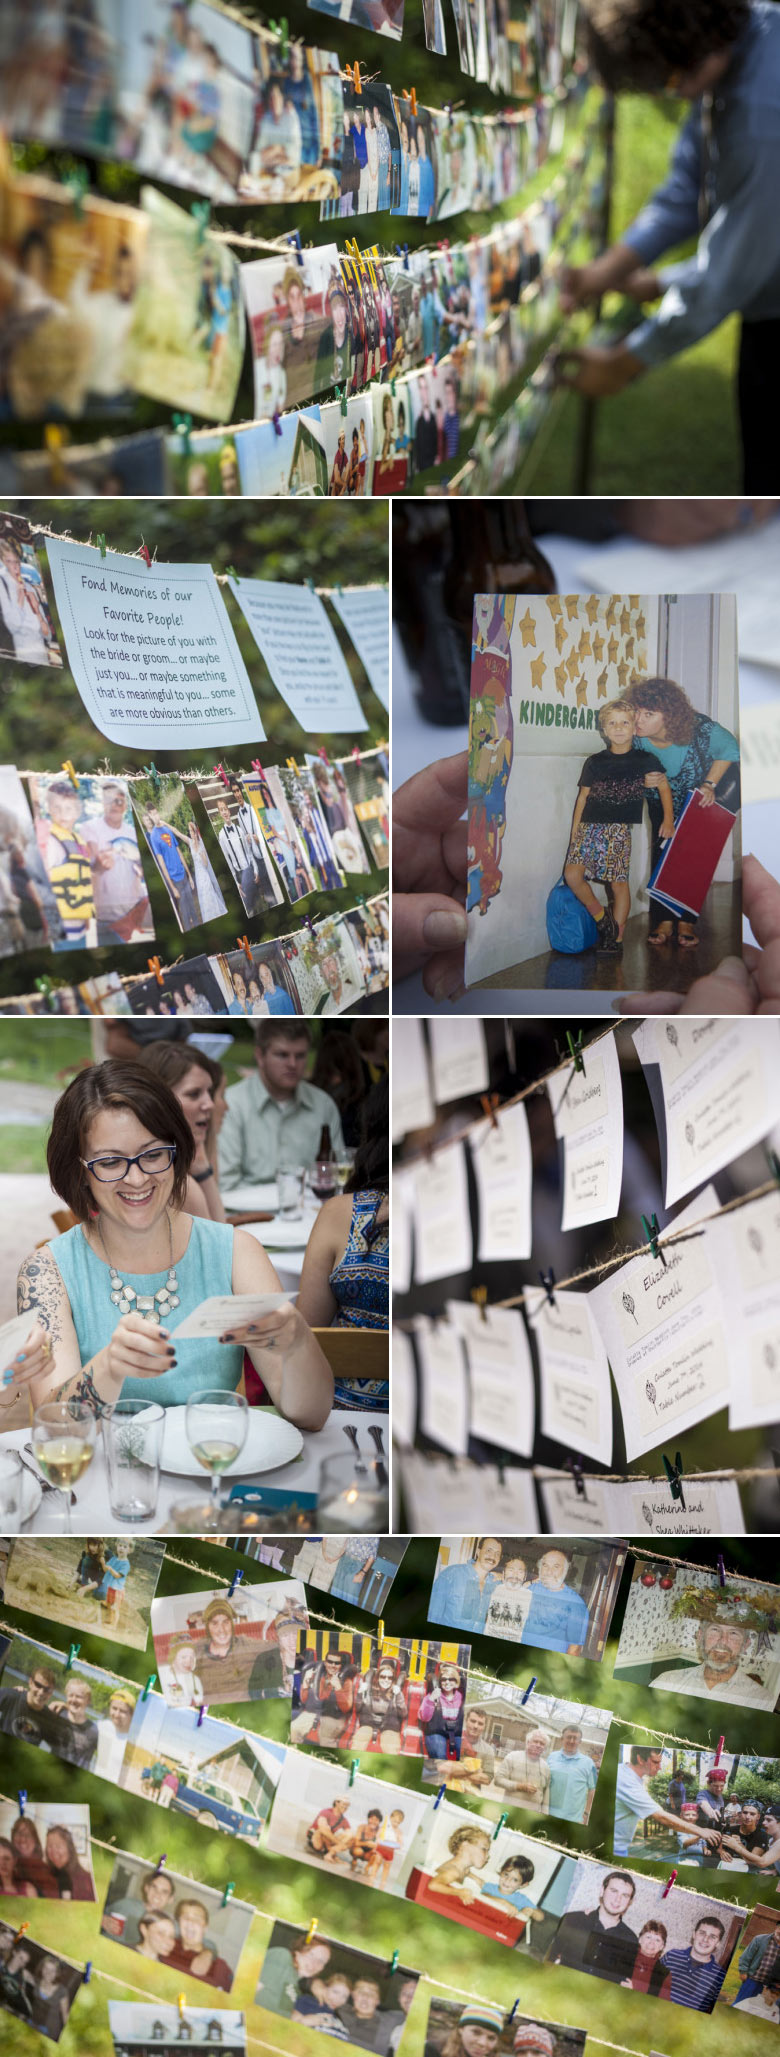
- An instructional sign
The first step is to source pictures of you with your guests. Choosing the pictures is the time-intensive part, so make sure to set aside enough time for that. Once you’ve chosen your pictures, you’ll need them to all be printed at the same size. We ordered all our photos online at ten cents a print.
Next, you’ll need to create labels for the backs of the photos. You can also write directly on the backs, but if you have a fairly large guest list, computer-printed labels are the way to go. We used a label template in Microsoft Word to print our guests’ names, our wedding date, and the words “Table Number” on the back, leaving the actual number blank. I can’t recommend that one tip enough—things change the week of the wedding, and though my original plan was to slap another label over top if necessary (I printed a stack of extras) just waiting to write in the uncertain ones at the last minute was critical. We also chose to print out instructional signs to include in the display, letting people know that these were their table numbers.
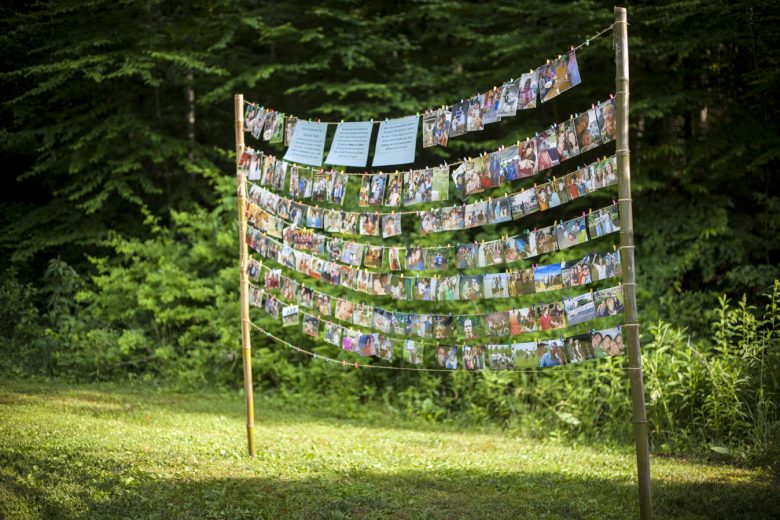
Finally, setting up the actual photo display depends on your venue. We liked the idea of being able to walk around it—some of the pictures might not have been very recognizable to our guests—so we wanted to set up a freestanding display. But if you don’t have the option or space to create that, you could suspend this on a wall instead, and your guests could always just flip the pictures over.
To create our freestanding display, the wonderful owners of our venue found two pieces of rebar that were about two feet tall and stuck them in the ground. They covered these shorter pieces of rebar with seven-foot tall pieces of bamboo. The rebar provided a strong, sturdy base to the nicer looking bamboo.
The size of your guest list will determine the number of rows of twine and the distance of the poles. To hang 133 pictures plus three 8″ x 11″ instructional signs, we placed our poles ten feet apart and tied eight rows of twine. When you’re determining the width of the display, it’s important to leave enough space so the pictures aren’t crowded—wider is better. Also, we wanted people to be able to reach the pictures without having to crouch down or stretch up too high, so we took that into consideration when figuring out how large to make it.
The Issues
The hardest part was figuring out which pictures to choose. Trust me, I sunk some hours into finding that one picture that best encapsulates our whole relationship for several of my close friends. With other guests (especially our parents’ friends) it was a bit of a scavenger hunt, and we made peace with being creative for some of their pictures. For our lovely neighbors, we had a picture of their house because we somehow never had a picture with them in it. I agonized over hurt feelings or having someone not feel special, but seriously nobody seemed too torn up about it.
Why It Was Worth It
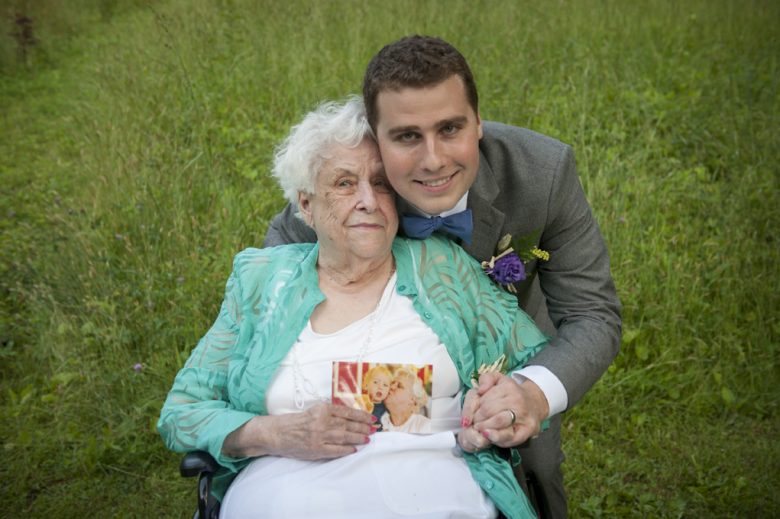
The vast majority of the pictures were meaningful and sweet for us and each guest. The picture of my brother telling me a secret while I giggle my fool six-year-old head off. That picture of my fiancé’s grandmother giving him a kiss while he focuses on his bacon biscuit—she didn’t put it down all night.
Even if we didn’t get to discuss each picture with each guest the day of the wedding, we certainly thought about it in the weeks leading up to the wedding and people have brought it up now, post-wedding. This was also a great way for our moms to get involved and in the wedding mood. Looking back at old pictures of their friends, some of whom they had not seen in years, who would be attending the upcoming wedding was a good change of pace from predictably tense conversations about specific wedding logistics.
On the wedding day, I loved looking around at all our people and seeing the pictures as a conversation starter. Guests seated at tables with people they didn’t know could ask about the other person’s picture and immediately have a story to tell or a connection to explain. Seeing the full display finally come together (despite the torrential downpour a couple hours before our outdoor wedding) was pretty cool (and a relief) but seeing people holding their pictures and showing them to each other was downright magical.