The wedding seating chart is one of those last-minute parts of planning that can surprise you with how hard (and time consuming) it is. So I’m here to give you all of the information you need to make creating your seating chart as easy (and tear-free) as possible.
The problem with the seating chart (other than juggling other people’s needs and emotions) is it comes just at the end of wedding planning, when you’re already handling a million things. Anyone who’s planned a wedding knows how those final weeks feel: it’s when you start to consider negative reactions you may receive as a result of the decisions you’ve made, while also trying to handle big-deal tasks that you couldn’t possibly have executed sooner. The seating chart is at the top of the list. I tell my clients, when they get desperate, although I could make your seating chart for you, you really don’t want me to. Context makes a great seating chart, and with my minimal context, I could just as well seat everyone in alphabetical order. And I for sure won’t know that your Aunt Sue has been mad at your Cousin Rob for years… only you know those details. 
You can’t move the seating chart to the top of your planning checklist: by nature, they have to be made at the end of the process, after your RSVPs have come in. And you and your partner have to be the ones to do it—not your planner (sorry), sister, or best friend. Also, egalitarian wedding alert: it’s painful to try and do this solo, so make sure you and your partner set aside time to work through this task together.
Also in Advice


Before I jump into specifics, I do want to point out that you don’t have to make a seating chart at all. You don’t even need to have enough tables for everyone. But consider the style of food service: if you’re serving anything that requires utensils, you want each one of your guests to have a seat at a table. I recommend assigning tables at the very least to avoid cafeteria-behavior: guests saving seats for all of their friends, guests who’ve come alone having to sit with strangers that they have nothing in common with, or couples having to split up due to space constraints. Spare everyone the awkwardness and plan out your tables.
Tips And Tricks For Creating A Wedding Seating Chart
What if I can’t fit all thirteen of my college friends at a table?
At most weddings, guests don’t spend much more than ninety minutes seated at their tables. At many weddings, those ninety minutes aren’t consecutive. Keep this in mind! You don’t have to make sure that everyone in each friend group is within a foot of one another, because they won’t be apart for very long (plus, they are adults). Although, if you’re keeping guests seated for six-courses that’ll take hours to get through, you may want to be a little more thoughtful here. In this scenario, it’s also worth giving guests who won’t know anyone a plus one to keep them company.
Place cards? Escort cards? Seating charts? What is all this?
If you’re going to assign seats or tables, you’ll need some combination of place cards, escort cards, and a seating chart. Here’s the difference:
- Place cards mark each guest’s assigned seat. (How to remember it: they’re at each place.)
- Escort cards tell guests their assigned table, and assigned seat if applicable. (How to remember it: they escort guests to their seats.)
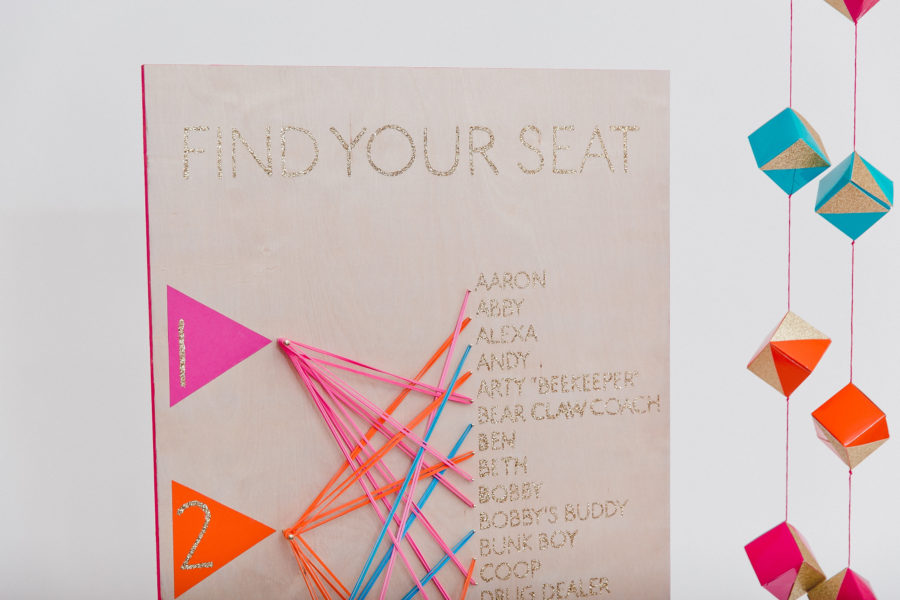
- Seating charts are essentially big posters that list every guest’s name along with their table assignment. Check out my favorite seating chart DIY here!
As always, you can choose whatever works best for your wedding. As you’ve probably noticed at weddings and on Pinterest, you don’t have to use actual cards for what are referred to as place and escort cards. You can use anything with the guests name and table number on it. So if you want to get creative, think about what your guests might like (if your partner’s family doesn’t drink, champagne glasses may not be the best choice here). Seating charts give tons of room for creativity, too, but make sure it’s large and posted high enough to see from a reasonable distance. Also, I’ve seen this done before and would advise against listing assigned seats on a seating chart. It’s confusing and your guests will most definitely forget their seat numbers by the time cocktail hour ends. If you want to assign seats, you can have place cards at the assigned table.
Where do we sit?
Listen to me: you do not need to have a sweetheart table. Whenever a couple tells me they don’t want to sit at their own table for two, they look like they’re telling me they didn’t do their homework. It’s okay! It’s your party! Sweetheart tables are great if you have a complicated family situation, and you sitting with one group versus another group is going to cause drama. They’re also great if one or both of you is an introvert and doesn’t want forced interaction during a meal. But beyond that, sit yourself with people you like.
Since more and more couples are going with long tables these days, I think a banquet-style head table with your immediate family and wedding party plus their dates is a fun option. You can also sit with just your parents, or just your wedding party and their dates. If you’re doing this, it’s ideal to put yourselves in the center of the room rather than at one end. You don’t want any of your guests to feel like they’re in the cheap seats.
Can I put thirteen people at a 60-inch round? It’s just one more person.
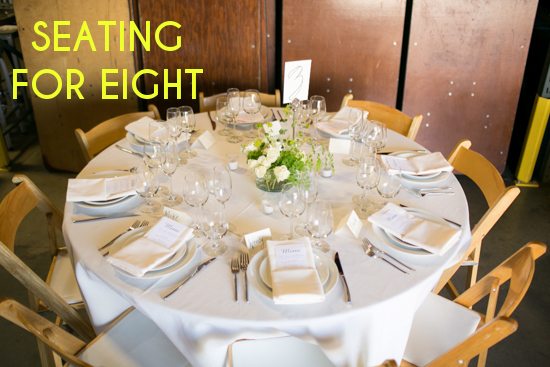
Before you start finalizing table assignments, make sure you have a good understanding of how many guests you can fit at each table on your floor plan. If you’re doing this thing more or less on your own, Meg covers things like “How many people can fit at this size table,” and “How far apart do my tables need to be so people can actually walk between them,” in the APW planner. But if you have a planner or caterer, ask for help: we can tell you, without any doubt, exactly how many guests you can fit at each table comfortably. We can also tell you how many will fit uncomfortably, or will look sad and unbalanced. Keep in mind that although it may seem like “just one more person,” at a certain point you cannot fit any more chairs around the table. Don’t make this mistake, because it is a tough one to fix once you’re setting up, and could even require an additional table (which, depending on circumstances, could be hard to get). Some examples are below:
For a 60-inch round, eight at a table is the sweet spot.
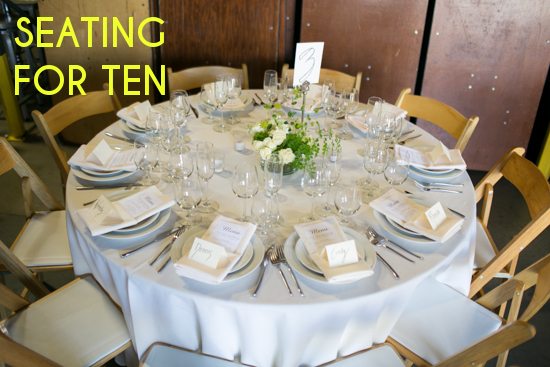
Ten is the absolute max, and is honestly a little bit tight. Look how close those place settings are to one another!
Six feels like you couldn’t fit these guests into other tables, so you just tossed them all together. Too much breathing room.

(For a 72-inch round, these same rules apply plus two: ten is ideal, twelve is tight, eight feels sparse.)
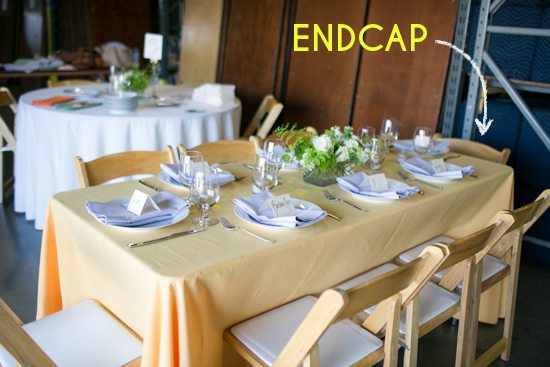
For a 6-foot-long rectangular table (which is usually considered standard), seating for six works best.
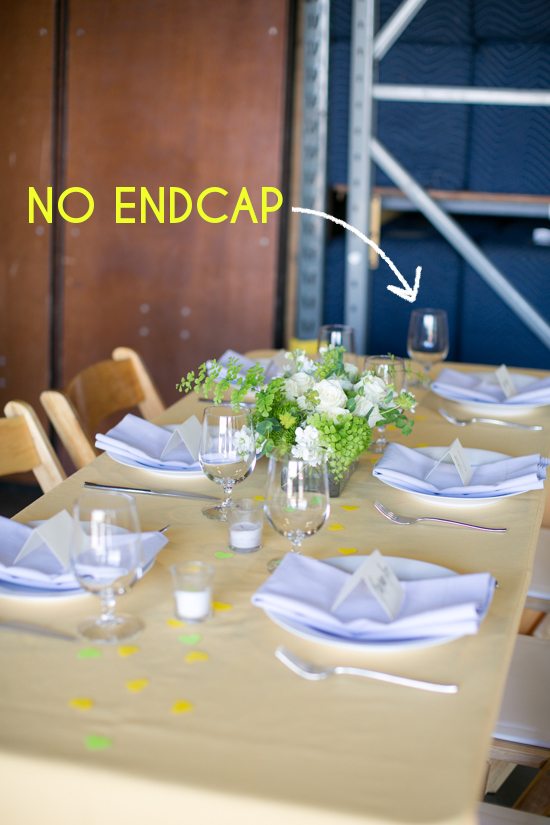
You can increase that number to eight if you add endcaps, which is a seat at each end. I’d recommend adding both or neither here, to avoid having the single endcap feel like the “head” of the table.
(For an 8-foot-long rectangle, you can seat eight before adding endcaps.)
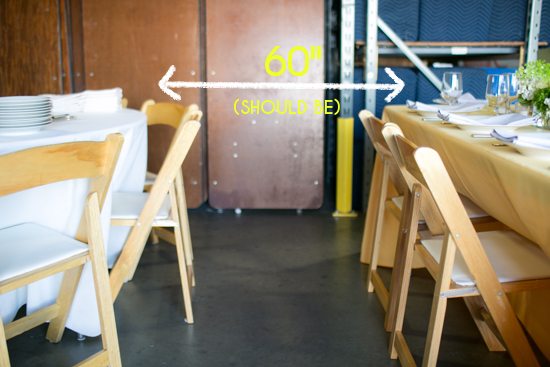
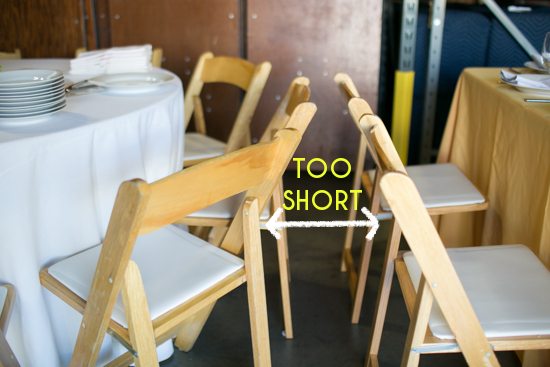
And don’t forget to leave enough space between tables! A good minimum amount of distance between each table is 60 inches if you’re using rounds (add about 6 inches more for rectangles), but I like more space than that to allow wait staff and guests to move comfortably through the room. You’ll want half as much space between a table and a wall. No squeezing!
OKay, we’re ready To Make A Seating Chart, Now What?
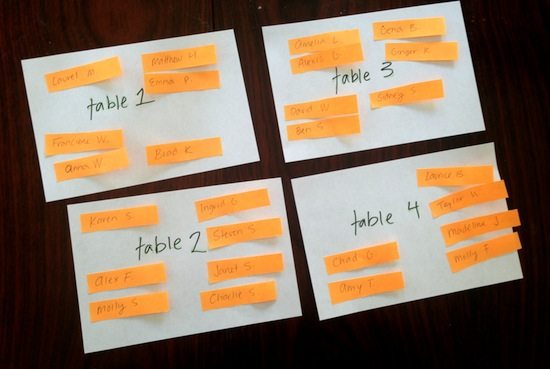
Anyone who knows me will tell you that I’m a systems and tech nerd. And there are lots of great tools out there, but I still think the best way to nail down seating is with a pen and paper. Index cards and sticky tabs are probably in your house somewhere, and that makes you fully prepared to take this on. Use the index cards to represent tables (write yourself a note for how many guests you can allocate to each one), then cut up sticky notes and label each one with a guest’s name. This allows you to move people around easily until it all feels right, like the perfect people puzzle.
Once you have everyone sorted, I do recommend that you add this information to a spreadsheet (hello, master guest list sheet!) at the very least. If you’re doing assigned seating (not just tables) especially, your caterer is going to need this information. It’s also helpful to label seat numbers on your floor plan if you want seat number one at each table to be facing a certain direction, to be absolutely sure that whoever does lay the place cards gets it right.
Keep in mind as you do this that your guests will generally try to behave themselves. Being seated at a table with someone that you don’t have the warmest relationship with does not ruin a wedding! And you’ll know if you have particular guests who are likely to throw fits, or just cannot be seated with each other. For those folks, chose their table assignments carefully. Everyone else, though, will be more than fine. With that much joy in the room (and an open bar), it’s hard to be sour about a boring table.

