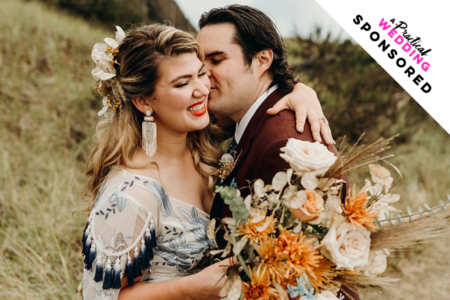
Back when I was wedding planning, flowers weren’t my priority. They just needed to be as no-nonsense and fuss-free as possible, and that meant lots of small thrifted glass jars with a few seasonal flowers in them, that we put together the night before.
Our flowers were perfectly delightful, and I got exactly what I was looking for—a simple, easy, clean fix. But as I sat there, killing time by fussing about with the extra flowers and greenery because we’d put all the centerpieces together in exactly one quarter of the time I’d allotted for them, I had to wonder: could I have done more? I’d shied away from large centerpieces because, quite frankly, they looked too hard. So many people had regaled me with their centerpiece horror stories that I’d forgotten that, you know, I’m usually pretty good at putting things together.
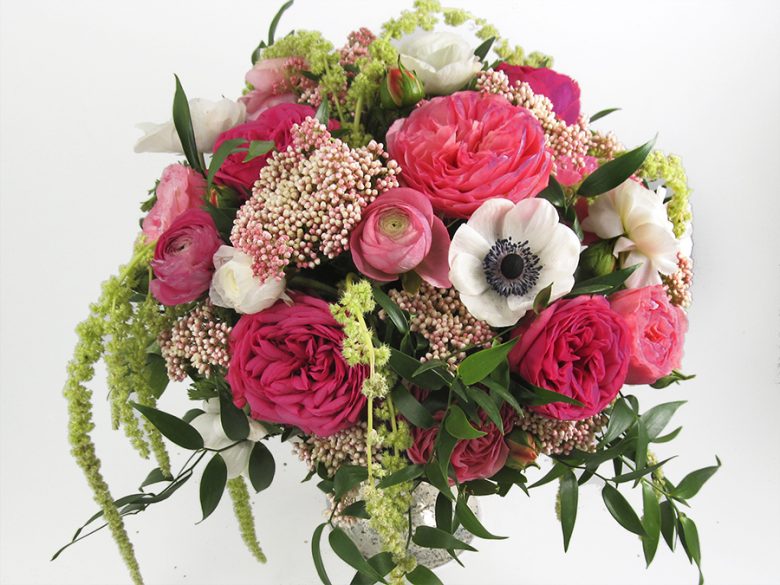
Because putting together centerpieces? Is not rocket science, not scary, and actually really fun to experiment with. So to further illustrate that hey, you can totally pull this off for your own wedding, today we have a bright, anemone centerpiece tutorial from longtime APW sponsors Blooms by the Box that, we hope, will help you make your DIY centerpiece dreams a reality. The flowers used in this tutorial are also all in season in May, so if you’re doing centerpieces right now, you’re in luck, because you can order all the flowers right now from Blooms by the Box.
What You Need: Your choice of wholesale flowers. We used Baroness Garden Roses, Miranda Garden Roses, White Ranunculus, Pink Ranunculus, White Anemones, Pink Rice Flower, Green Hanging Amaranthus, and Italian Ruscus.
Floral Supplies: Floral scissors, a floral foam block, and a floral receptacle (a vintage pedestal vase in our case!)
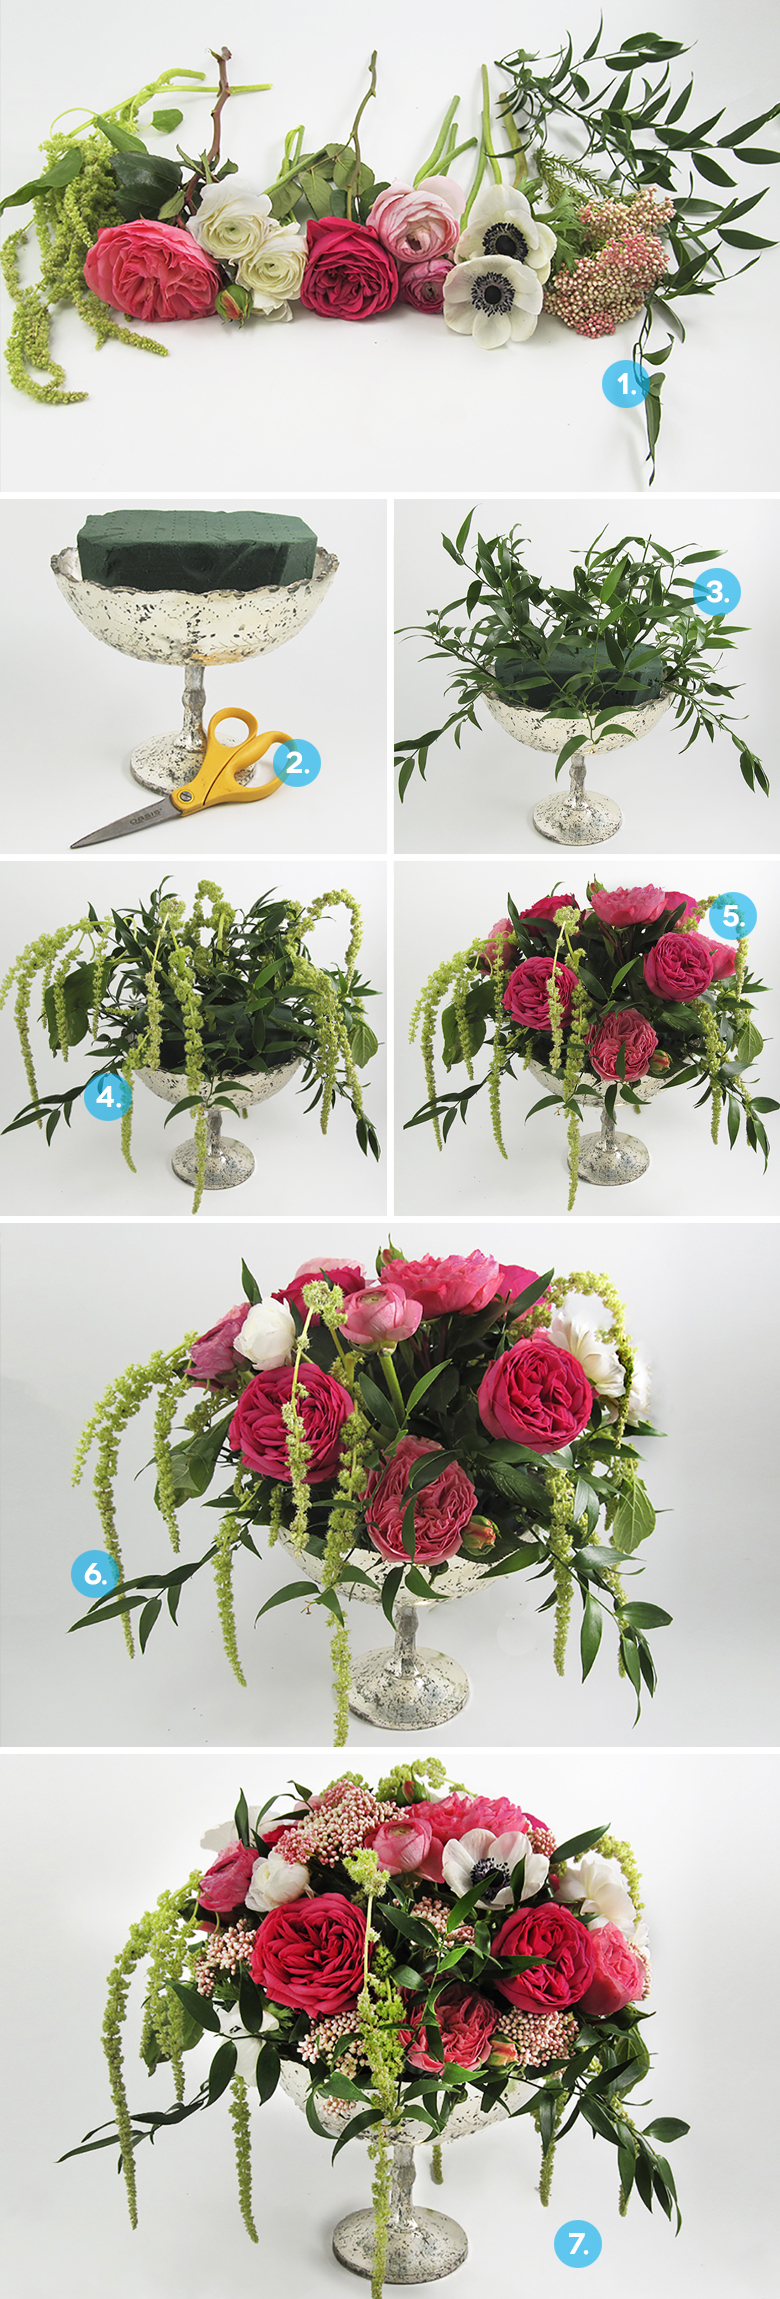
Step One: Prepare your flowers for arranging. Remove thorns, lower leaves, guard petals, and any bruised petals. Cut one to two inches off the stems on a forty-five-degree angle under lukewarm running water. Then, remove all lower leaves that may reach the water line in your hydrating containers. Store the flowers in a cool, dry place, out of any direct sunlight or draft. Hydrate the flowers for at least four to six hours.
Step Two: Cut your floral foam to fit inside your vase. Soak the floral foam in water mixed with flower food. Simply place the floral foam in a bucket of water that has flower food in it. Do not push the floral foam under the water, allow it to sink naturally. The foam is ready for use once it is floating in the water and has finished releasing water bubbles.
Step Three: Create the arrangement shape and foundation using greenery. Simply push the stems into the floral foam, keep in mind the angle you use to insert stems will determine how the greenery stands. Italian Ruscus is the perfect candidate for the job. It is stiff enough to create a determined shape, yet flowy enough to create the draping/vintage technique.
Step Four: Add the Hanging Amaranthus. Use the Amaranthus at the beginning so the hanging elements peak through your focal flowers.
Step Five: Add large focal flowers first. We started out with our rotation of Baroness and Miranda Garden Roses. We inserted them into the arrangement, leaving plenty of room for our secondary flowers (the Anemones and Ranunculus).
Step Six: Add your secondary flowers. It helps to pick a large focal flower, a small secondary flower, a filler and a greenery when making your own arrangements. In this case the Garden Roses are the large focal flowers, Anemones and Ranunculus are the small secondary flowers, Rice Flower is the filler, and the Amaranthus and Ruscus are the greens.
Step Seven: The filler flower takes on its role in the final step, filling in spaces. Fill in any area that has a space, where you can see too much greenery, or shows the floral foam. Survey your arrangement from all angles, and check to make sure that you have covered all the areas. Once you are happy with your arrangement shape and size, you’re done!