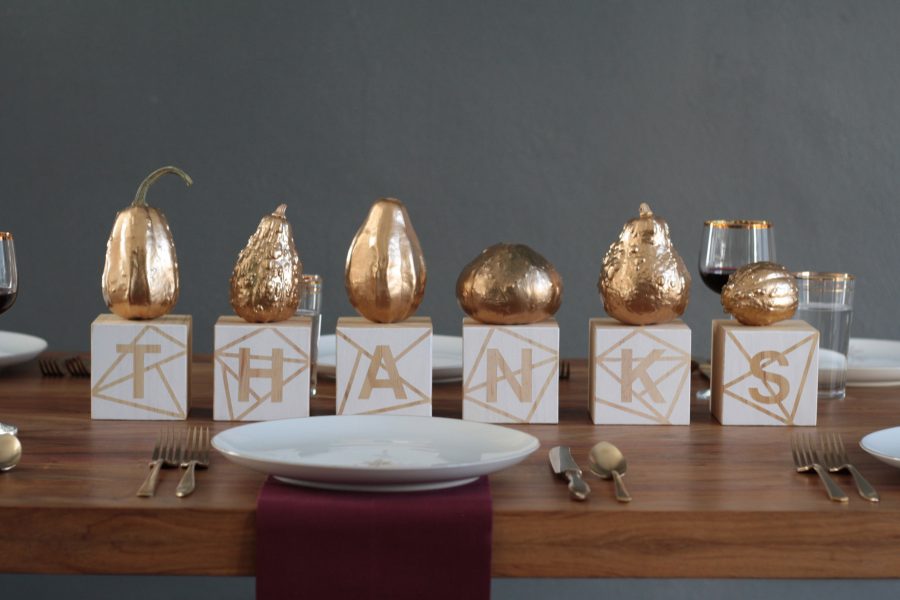
Last week, when we showed you how to make geometric place card settings, I was dying to give you all the details about the matching centerpiece that Tabitha, the talented wedding designer behind LA based Winston & Main, designed. Because guys, this is one of the most versatile centerpiece ideas I’ve seen in a long time—and it’s nearly as easy the tutorial for the place cards. Not only that, but the options for customizing this centerpiece are pretty endless, from color options, to whether or not you’d like to spell out words (and then which words), to your choice of decoration on top. Seriously, I want at least twenty of you to make this and send me photos of how you made it your own, because I know each of them would probably be unique.
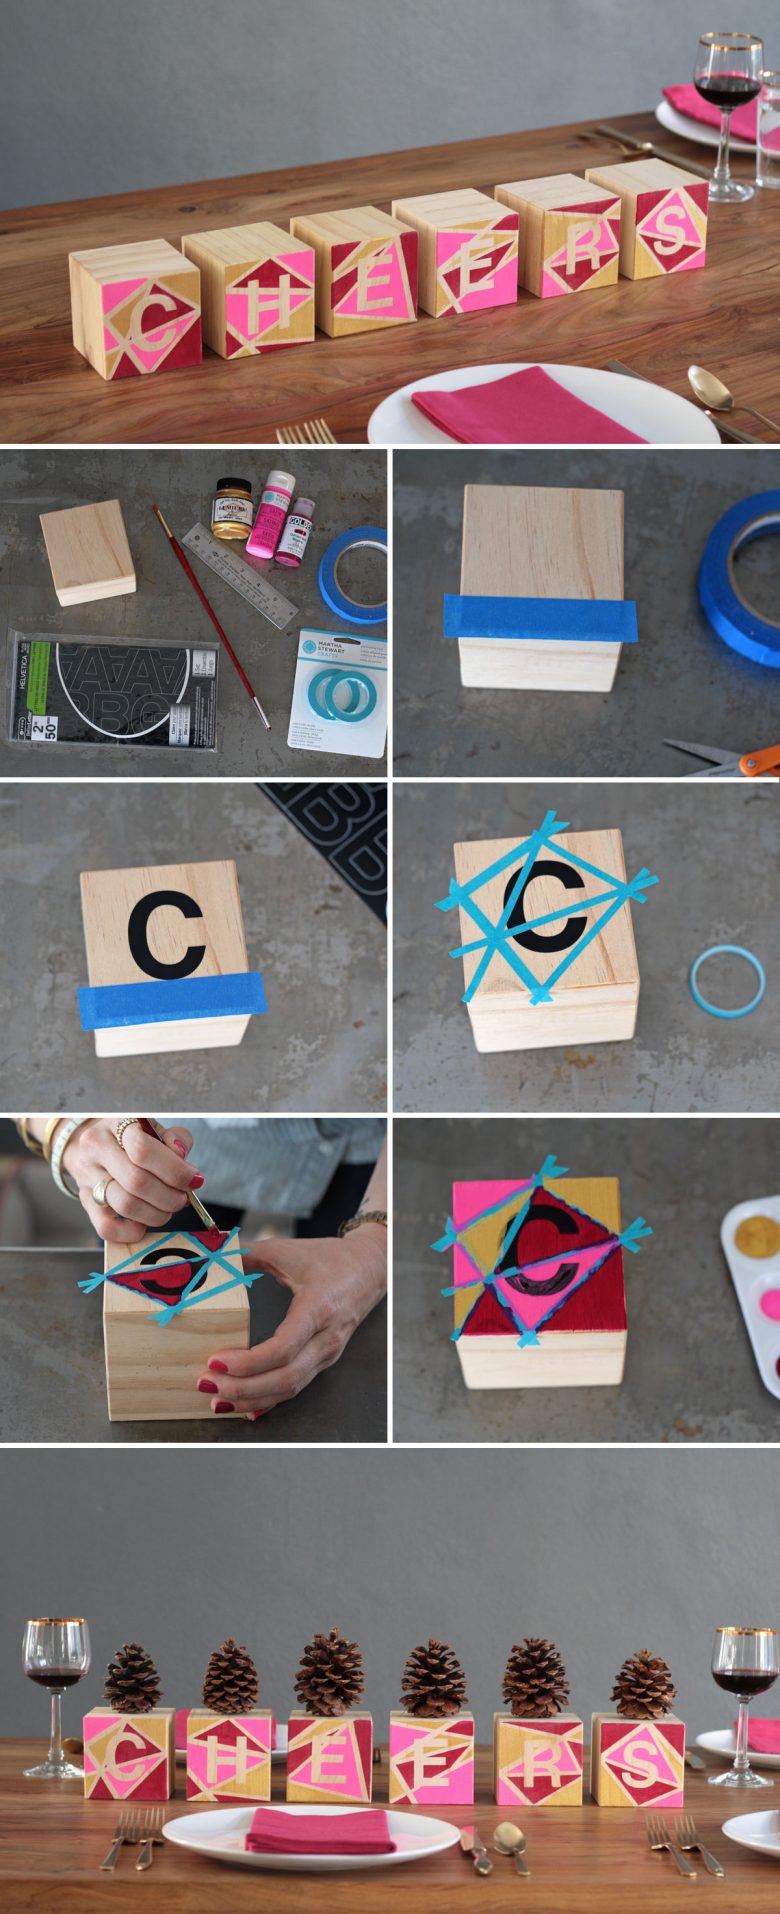
Materials:
- Six 4×4 wood blocks
- 2” vinyl letters
- Painters tape
- Pattern tape (1/8″ and 1/4″)
- Acrylic paint (magenta, pink, gold)
- Paintbrush
- Ruler
- Pinecones (optional)
- Spray painted gourds (optional)
Cost Estimate: $45. This accounts for all the supplies, so your cost will decrease if you want to make a second or third set, because you’ll have leftover tape, paint, etc.
Time Estimate: An hour to an hour and forty five minutes, plus drying time.
Directions:
1. Tape off a line 3/4″ from the bottom of your blocks with painters tape.
2. Center your vinyl letter on the block, using the painters tape as a guide for the bottom of your letter.
3. Add one or two 1/4″ stripes with patterning tape.
4. Now add more 1/8″ stripes with pattern tape to create triangles.
5. Use the back of your paintbrush to really secure the tape where it overlaps other pieces of tape or the letter.
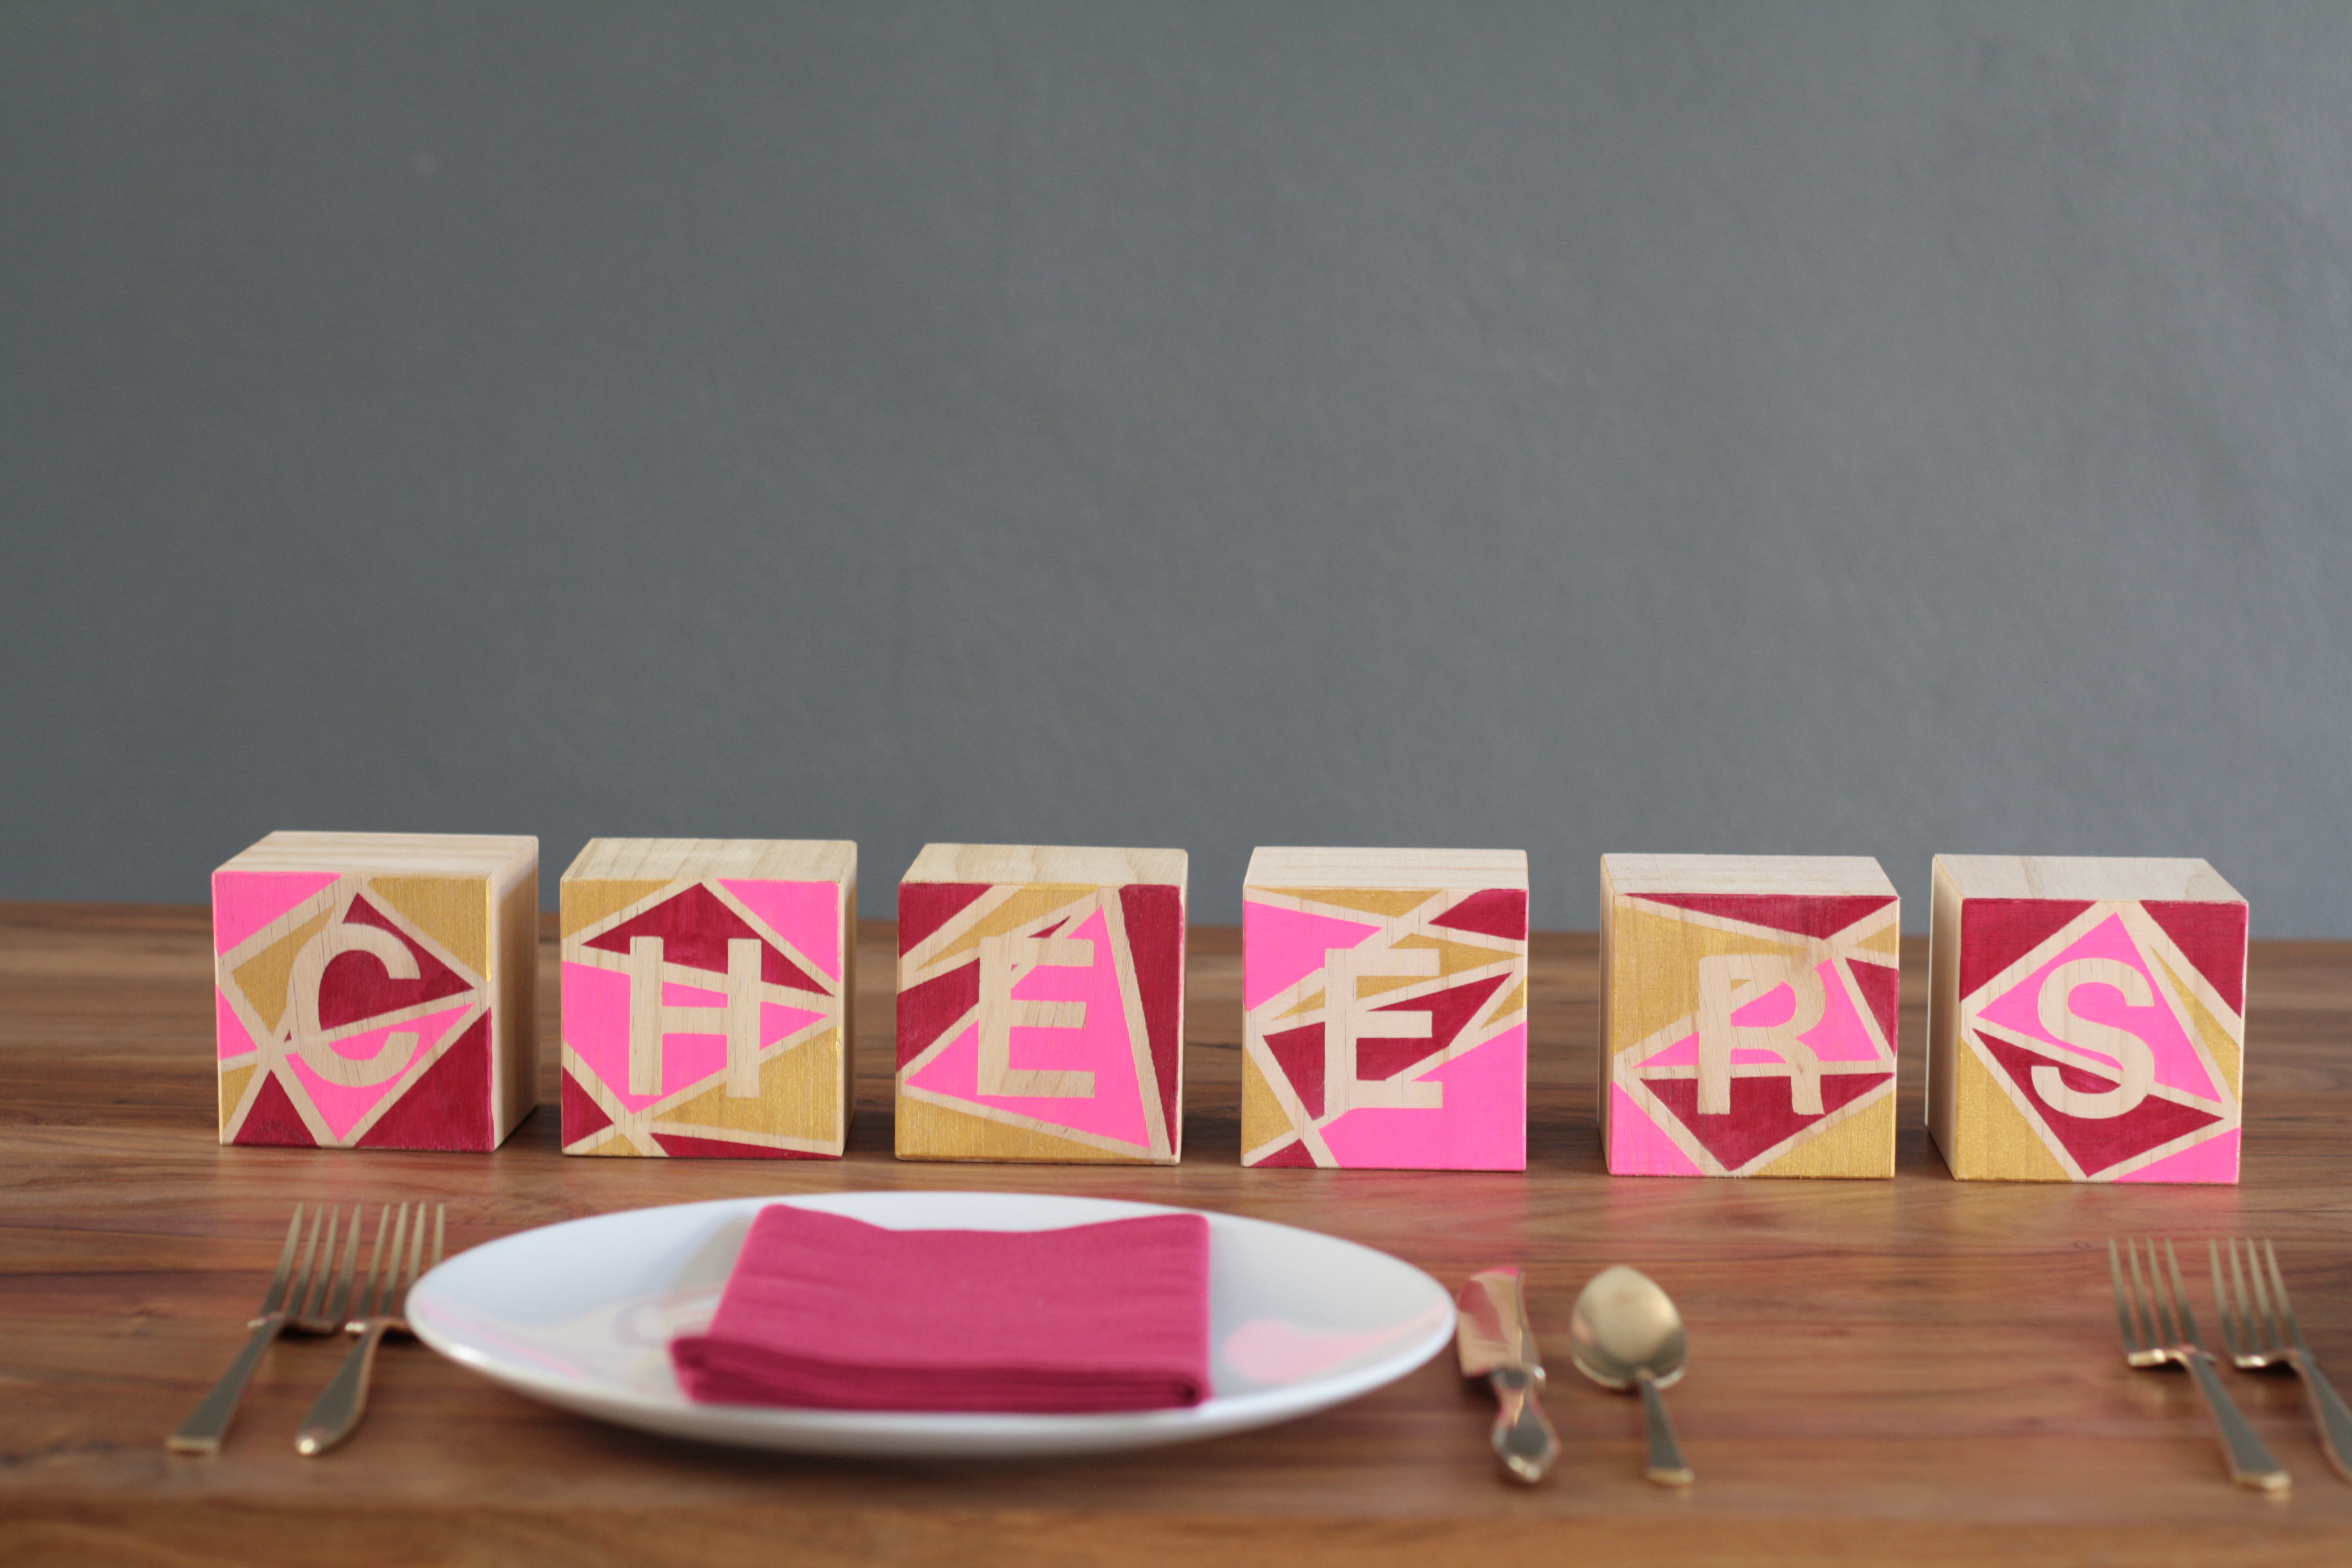
6. Paint a few triangles each color—magenta, pink, and gold.
7. Let dry, then peel off tape and you’re done!
8. Optional step: add pinecones, or spray painted gourds! Or, top your blocks with whatever you choose.
Modifications:
1. Change the word you’d like to spell, or make table numbers, if you’re making these for a wedding.
2. Change the color combo—choose a few colors and a metallic, go for a single color in multiple shades, the choice is yours!
3. Use different wood blocks, or stain your wood for a darker background color if you’re using lighter colors.
4. If you want to churn out a bunch of these, save money by buying a 4×4 piece of wood and having it chopped into blocks. Also, check Etsy or eBay for precut blocks.
Tips & Tricks:
1. Assembly line this project and it goes by super quick! Apply all the tape, then all the letters, then all the pattern tape, then paint all the pink triangles (on all six blocks) then all the magenta, and I’m sure you see where this is going.
2. If the paint bleeds, or you want to clean up your lines a little bit you can use an X-Acto blade or a little piece of sand paper.
3. And if you’re a crazy perfectionist and it will drive you nuts if every line isn’t perfect, you can spray your cubes with a clear matte acrylic sealer before you begin the project.


