
A few weeks ago, we showed you the basics of how to build a wedding website using Squarespace. If you’re at the “but which platform should I use?” part of creating your wedding website, with Squarespace the focus is on design features (rather than, say, task management), which means you get things like mobile-friendly templates, password-protected pages, and a custom URL in addition to wedding website standards like online RSVPs, registry pages, and pretty galleries.
You don’t need to know anything about coding or web platforms to use Squarespace, but you should have enough patience to tinker around and personalize a plug-and-play website. (If you were proud when you finally mastered PowerPoint, or hell, if you understand how to use PowerPoint at all, Squarespace is for you.) For a refresher of how to set up a basic wedding website on Squarespace, head over here for your CliffsNotes.
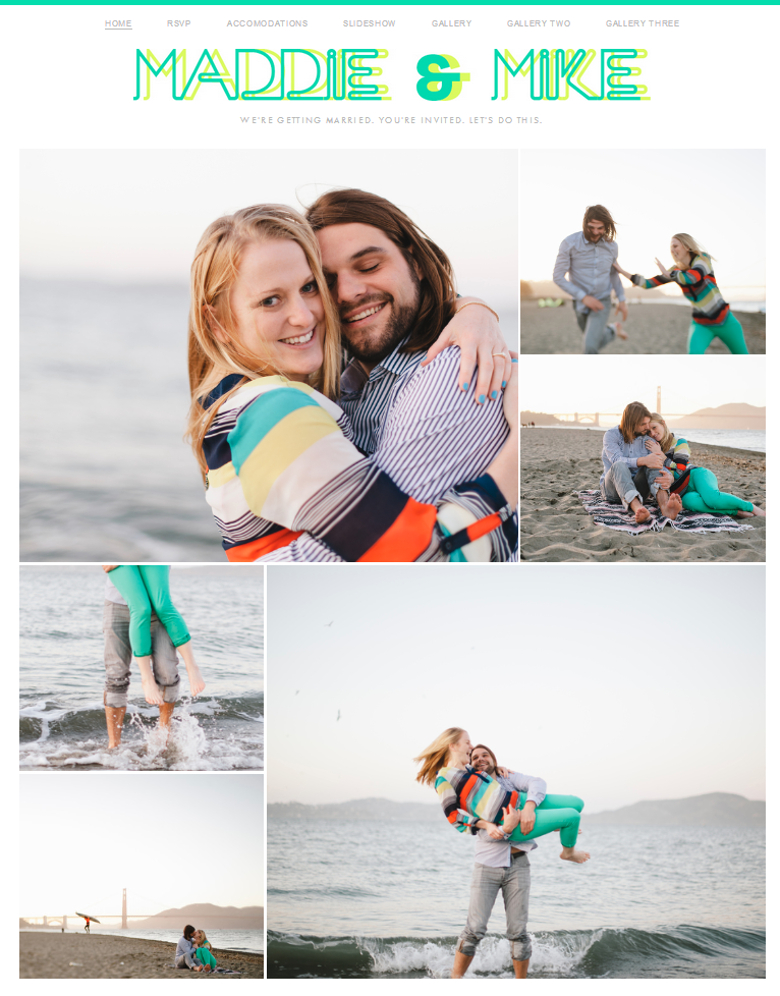
Finally, A Place for all Those Engagement Photos
In our previous tutorial, we showed you how to make a wedding website when you have one really nice photo and want to use that as the backdrop for your site. Of course you don’t need any photos at all to make a well-designed wedding website, and I’ll go over that option in our next tutorial. But what if you’ve got the opposite problem? Maybe you got a free engagement session with your wedding package and now dozens photos of you and your partner looking hot in dappled sunlight sits on your hard drive begging to be displayed somewhere. (Make a few prints? Put them on Facebook? Give them to your mother-in-law? Or make a whole website dedicated to your face? The answer is E. All of the above.)
Pick Your Template
Squarespace’s templates are meant to be modified. But if you plan on using a lot of photos, I recommend choosing a template that’s suited to portfolios, since those templates are designed with photos in mind. Yes, you can use any of Squarespace’s templates to make your wedding website, but it’s going to make your life unnecessarily harder not to take advantage of one of the dozen or so templates that are specifically really gallery-friendly. (I’ll talk about the… failed… template hack I did for today’s example, which was modified from an e-commerce site, and be your object lesson.) If you do choose something that isn’t designed for portfolio use, just prepare yourself to devote some time to hacking it.
Like last time, pay attention to the front-page layout of your template, since that’s where you’ll have the least amount of control over what you can change. You can do a lot to make your Squarespace’s template your own, but menu and logo placement are less customizable, so make sure you pick a template where those things are (mostly) already where you want them. And if you want a full-bleed gallery design (like in the Ishimoto template, where it touches both sides of your screen without a border), definitely choose one that has that built in.
For an idea of how customizable each template is, look at the customer samples featured underneath the design. If there are few variations on the original theme, consider that one less pliable. If there are more, you’ll have more to work with. We asked Squarespace which templates they recommend for photo-heavy websites, and they suggested:
The Art of the Gallery
One of the things Squarespace does really well is that it takes the guesswork out of photo sizing for you, no matter what size screen your guests are looking at. So if you’ve got a disk or drive of high-res image files from your photographer, and the thought of having to figure out pixels and resolution leaves you paralyzed, don’t worry. Squarespace does the heavy lifting for you, and their basic pricing plan includes up to two gigs worth of storage, which would be plenty even if you decided to include every last one of your engagement photos. (For more advanced users, check out Squarespace’s best practices tips for photos over here.) Once your photos are uploaded, Squarespace galleries can take the form of grids, slideshows, and stacked images, and there are a few different ways to incorporate galleries into your site.
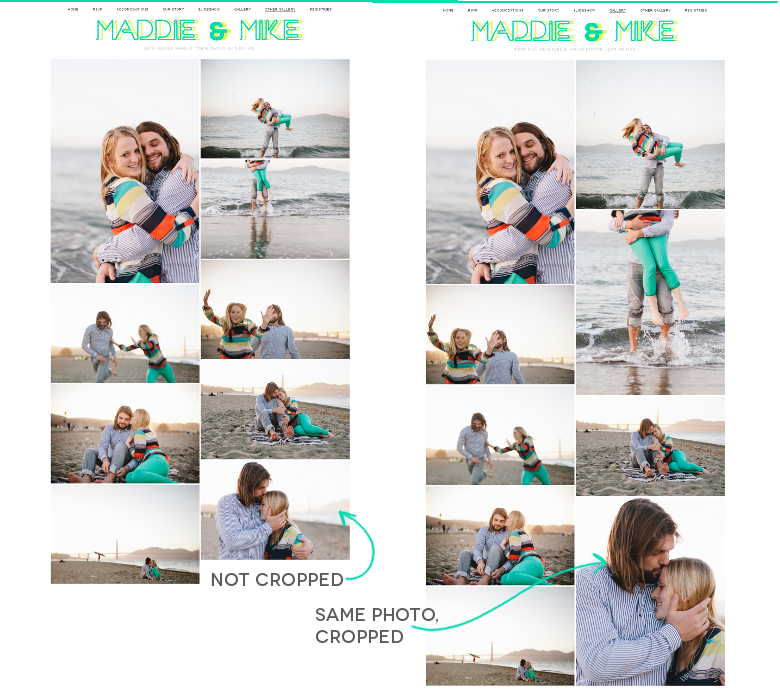
The Gallery Page: When you add a new page in the backend editor, you’ll notice that you can choose from a bunch of different styles for that new page (products, gallery, events, album, etc.). If you choose “gallery” as your type, then your whole page will be photos, and you can’t add any extra text or anything else to that page. Gallery pages are easy to customize within the style editor (more on what that is over here). You can customize the size of the spacing around your photos, how many columns of photos you want, and whether they should all be the same size and shape, or if they should remain in their natural aspect ratio.
Pro tip: If you want that Pinterest-style gallery on the right, try cropping a third or half of your images into vertical and square photos and then stagger them in with your horizontal images. You can do these kinds of crops really easily with any of the free photo software built into your computer.
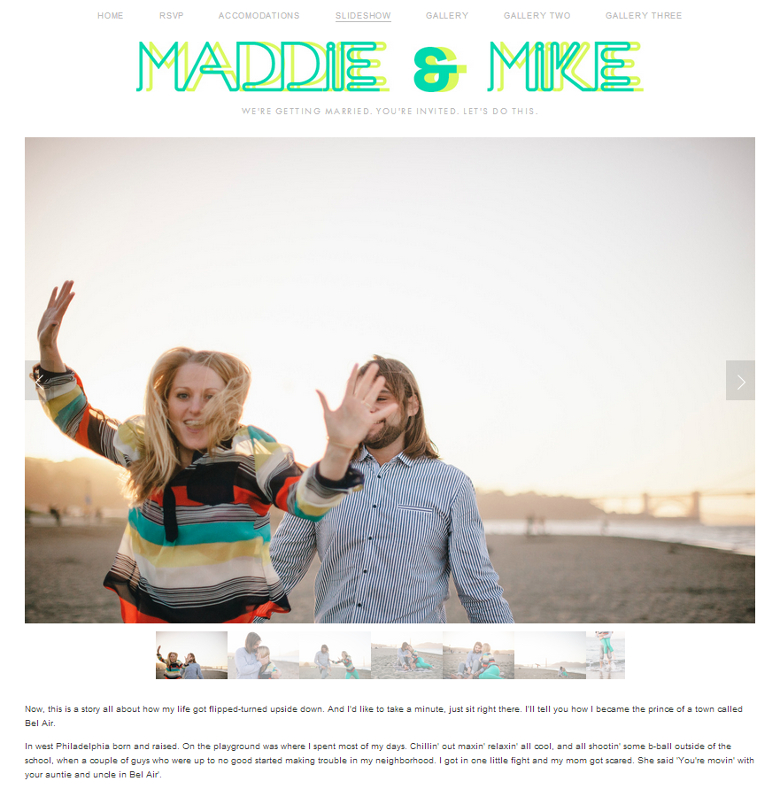
A Gallery Within A Page: Galleries can also be created within pages, which is especially useful if you want to put pictures and text together. You can insert a slideshow, stacked images, or a grid into any regular page on your Squarespace site (though note that the in-page grid option doesn’t have as many variables as a stand alone gallery page). Galleries within pages are one of the few elements you need to edit from the Squarespace backend editor instead of the live style editor. Just double click on your gallery and you can update the design to change it to a slideshow, add or remove thumbnails, etc.
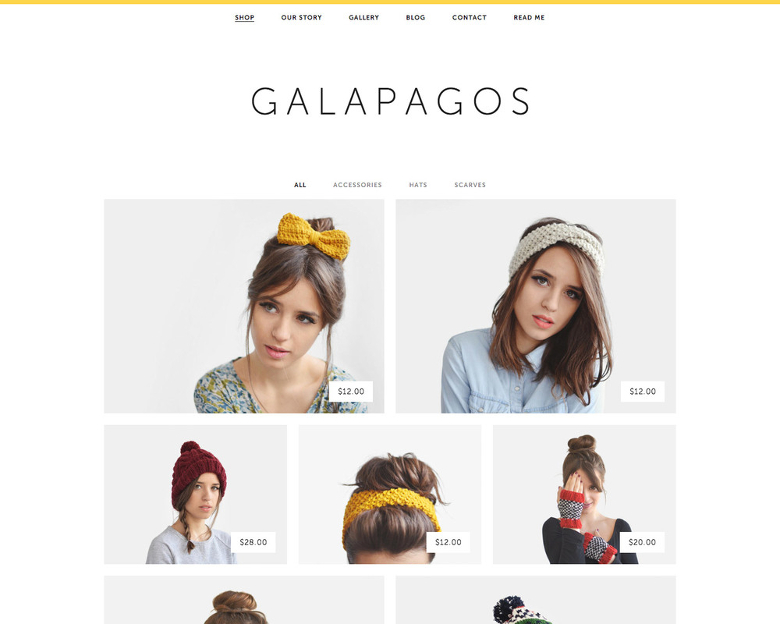
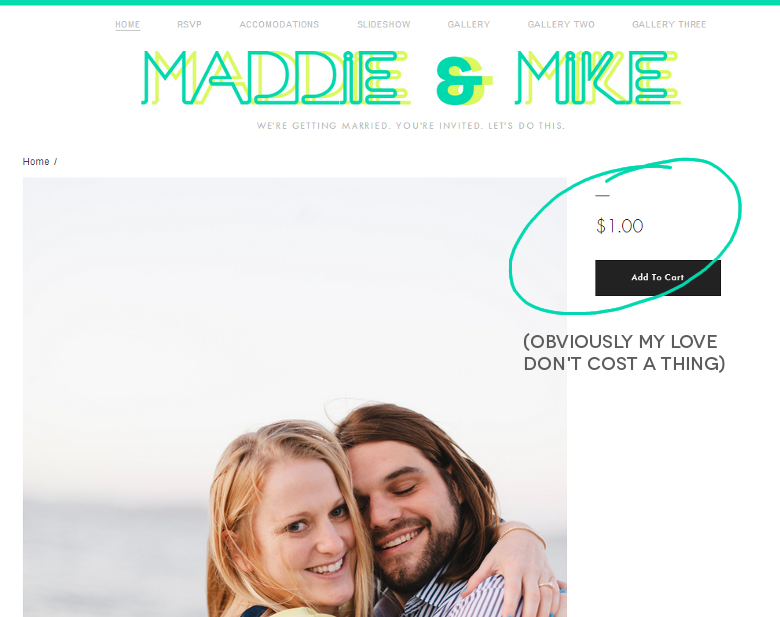
The Hacked Gallery (fail): Even though Squarespace has plenty of gallery-friendly templates to choose from, I chose the Galapagos theme for the sample site I’m showing today because I really liked how Galapagos laid out its front-page image gallery. But because Galapagos is an e-commerce template, it turns out that “gallery” I liked is actually a product page, and not a gallery page (which behave very differently from each other). While I could have easily swapped templates without paying extra or losing the photos I uploaded, instead I decided to upgrade to the $16 a month subscription from the $8 regular subscription to try and hack the e-commerce template and… it turns out the drawback to using a product page as a gallery is that you have to assign a price to your product. You can hide the prices and other product info on your front page, but if people click on your images, they will be led to a product page that has the cost listed on it, and they might get confused about why you and your partner cost a dollar. So look at me, I just saved you $8. I probably should have listened to my own advice about using a portfolio template instead of an e-commerce one.
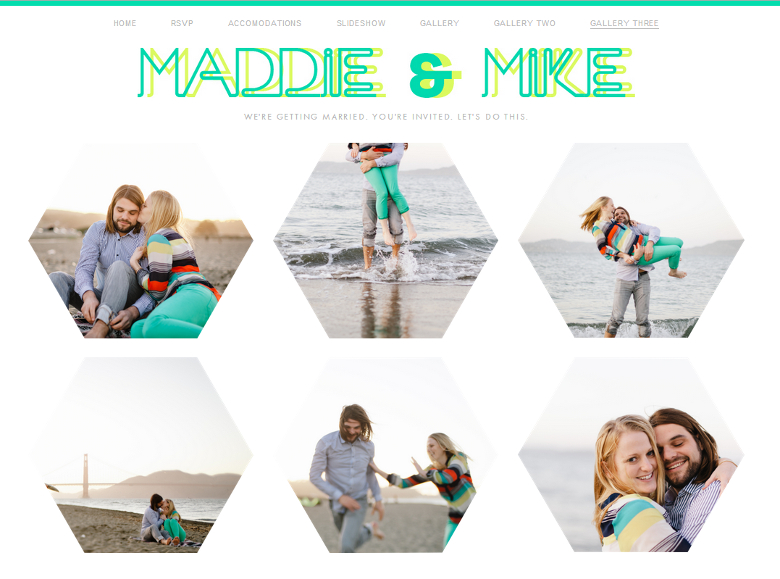
Getting Fancy
For those of you who feel a little more comfortable with graphic design, you can customize your galleries by making adjustments to your photos in Photoshop before you upload them into Squarespace. For example, I cropped some of my images into a hexagon shape in Photoshop, and then uploaded them into a gallery page on my Squarespace site. This is a relatively easy process, even if you don’t have Photoshop skills. I had no idea how to make shapes in Photoshop before writing this post, but a quick YouTube search yielded a tutorial that gave me the answer in about five seconds. (Side note: the availability of a $9.99 per month Photoshop subscription option is the only reason I stopped using freeware for graphic design. But it goes without saying that most programs that allow cropping into shapes should suffice here.)
Squarespace isn’t the place to try and reinvent the wheel, which is a relief honestly. There is enough to do with wedding planning, and reinventing the wheel with your wedding website (or, um, trying to do crazy hacks) really shouldn’t be on your list. There is a lot you can do with their pre-made templates, especially if you’re willing to get creative. If I’ve learned anything teaching myself this software so far, it’s that if you have a question about how to do something, someone has probably already thought of it. So in addition to Squarespace’s 24/7 support, don’t forget to take advantage of their support forums as well.
Next month we’ll be covering building a Squarespace wedding website using mostly typography. We’ll show you a few tricks for making your own logo (like the five minute one I created for the sample site used in this post). In the meantime, if you’ve got questions about how to make your wedding website a reality, leave them in the comments!
SQUARESPACE IS OFFERING 10% OFF YEARLY SUBSCRIPTIONS TO ALL APW READERS. JUST USE THE CODE APW14 AT CHECKOUT! CLICK HERE TO START YOUR 14-DAY FREE TRIAL.
![]()
This post was sponsored by Squarespace. Thanks Squarespace for helping make the APW mission possible!

