Let me start by saying I’m a sucker for shiny, metallic, sparkly things. In my younger days, I would go out into the night with a DIY glitter mask, my glitterati crew in tow, and teach the way of the sparkle (aka mini-workshops on using glitter as eyeshadow). Now, I’ve grown up a little and my patience for daily glitter crafts isn’t as high as it used to be, but still: when I see a colorful, sparkling thing of beauty, I’m mesmerized. I mean, look at the confetti in this wedding and tell me you can’t help but smile.
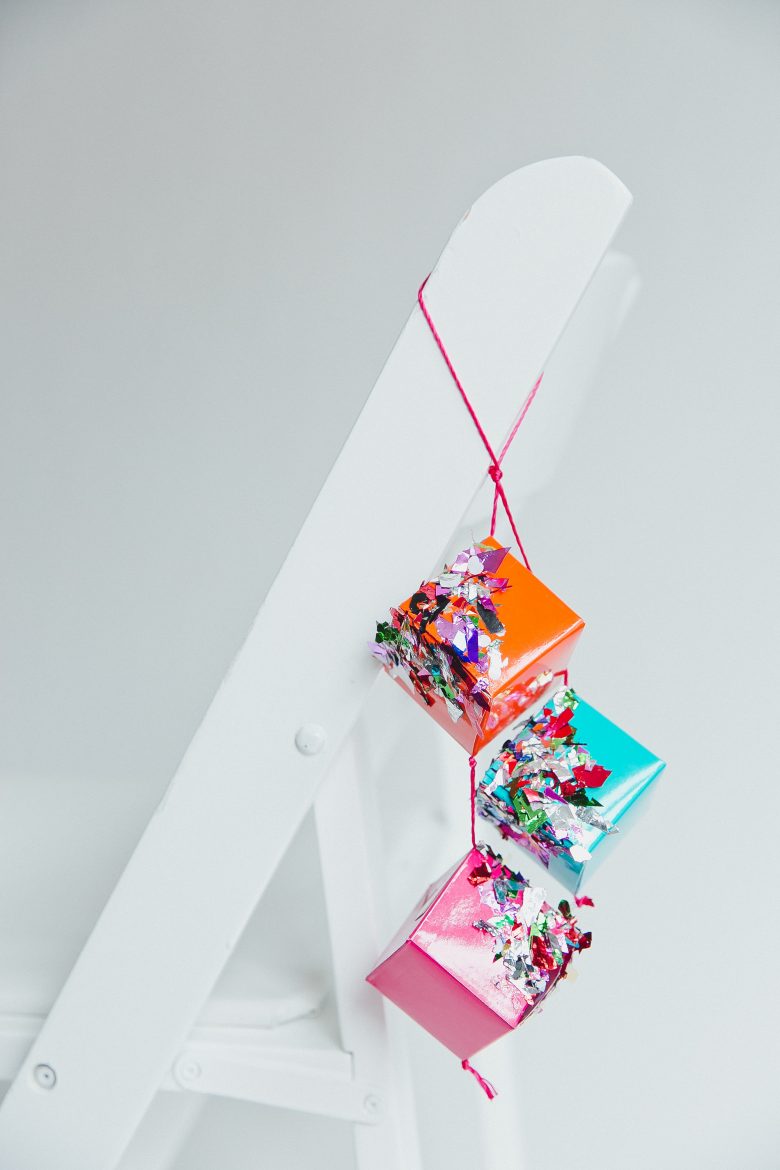
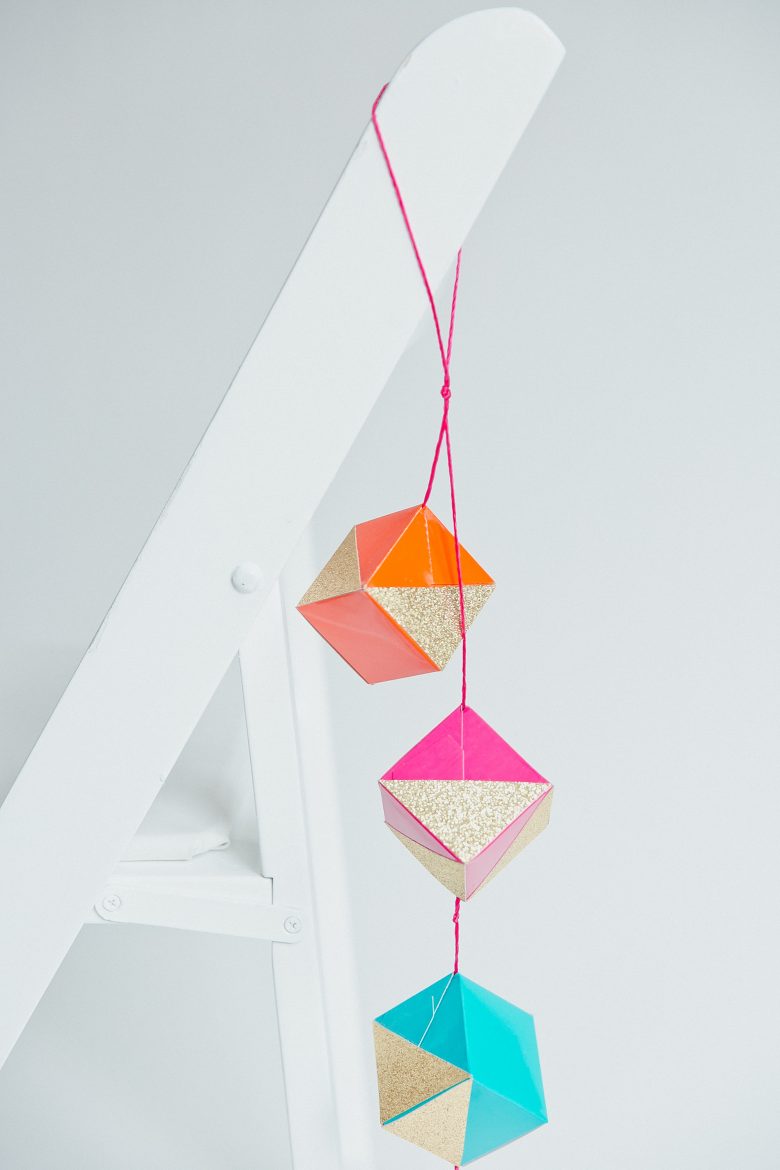
That’s why I’m so into these confetti throwers that our resident DIY genius, Tabitha of Winston & Main, whipped up for us. Not only do they provide your guests with easy confetti access in the event that you’re planning an epic ceremony exit (like here, here, and here). But they also follow our decor principle that all wedding extras should do double duty. (In this case, these confetti throwers also function as bright, shiny, cheap aisle decor.) Should you want the sparkle but don’t have the time to deal with the mess of a sparkle/glue combo, there’s even some simplified modifications at the bottom of the instructions!
Confetti thrower materials:
- Three 2x2x2 gift boxes per chair decoration (50 for $9.95)
- One yard twine or ribbon per chair decoration ($3.99 will take care of a lot of chairs and a garland to two)
- Foil confetti ($1.29 will do a lot of boxes, but if you want to fill them too, then try buying in bulk!)
- Mod Podge
- Patterning tape/painters tape
- Curved upholstery needle
- Scissors
- Optional: card stock

Directions:
1. Cut card stock into 2×2 squares and use it to reinforce the bottom of each box. This step is optional, but Tabitha liked the way it flattened the bottom of her boxes.
2. Tape off a few sides of the box, diagonally, corner to corner.
3. Paint taped off areas with Mod Podge and then carefully pull off tape.
4. Sprinkle confetti over Mod Podge and let dry.
5. Fold a piece of twine in half and tie a loop at the folded end, which will allow your decoration to hang off your chair. You now have two ends of twine hanging down…
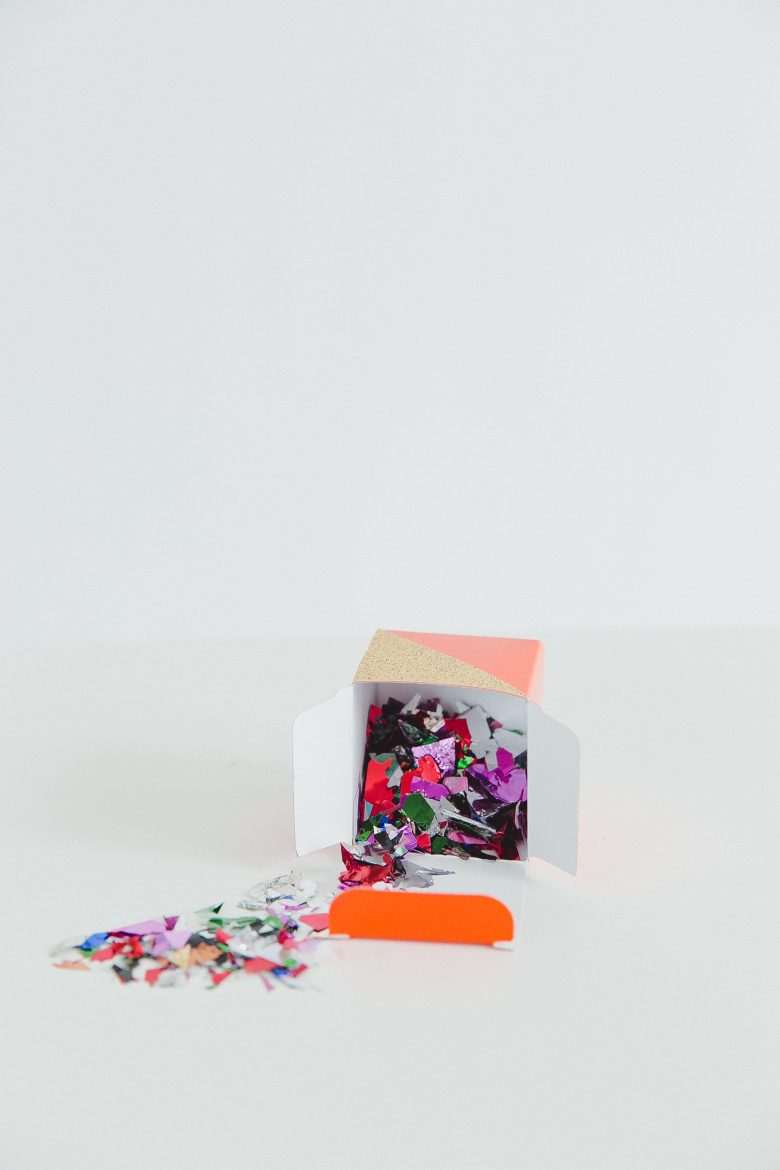
6. Open the top of a confetti covered box and then use the (scary looking) curved upholstery needle to thread one end of twine through the bottom corner of the box, pulling it up and across the box to come out the diagonal corner. Close the lid to keep it in place.
7. Tie a knot in the twine wherever you want your box to rest.
8. Follow steps 6–7 on the other end of twine, this time stringing two boxes onto the same piece of twine. Use knots to keep the boxes spaced at whatever interval you like. And done.

Modifications:
- Before you close the lid on step 6, you could fill your box with confetti, flower petals, bubble jars, or anything else you want your guests to throw at you on your way back down the aisle.
- You could use different colors and sizes of boxes to mix it up a bit.
- You could leave your boxes unadorned, swap the confetti for glitter, or even better, use self-adhesive glitter paper cut into triangles to create the same diagonal decor on each box, minus all the mess.
Tips & Tricks:
- If you use a synthetic twine, you may want to burn the ends to keep it from fraying.
- You can use a ruler to measure the distance between the knots if you’re going for a uniform look (or maybe stringing garlands together).
- Be gentle when threading your boxes together. Tabitha used the corner where there was a slight opening already, rather than puncturing the boxes with the needle.